Friday, September 5, 2025
FAIRY HOUSE DRAWINGS
Fairy House Drawings Learning Targets

I can...
- Create an original Fairy House Drawing using painting techniques learned in class
- Use line types (horizontal, vertical, diagonal), shape variation (geometric, organic, free form), and texture (visual, actual, implied) inspired by American Artist (2011-Present) Cindy Dauer
- Use drawing techniques (shading, hatching, stippling, scribbling) and design principles (proportion, emphasis, variation) based on American Art
- Define Architecture (the process of designing and creating buildings)
Lesson One
Day One, Art Start
1. House With Plant Monster (2015) Cindy Dauer

2. Read Ralph Masiello's Fairy Drawing Book (Ralph Masiello's Drawing Books) by Ralph Masiello

3. Discussion Questions "What are some things you see the people doing in this drawing? What are some things happening in this drawing? What kind of gnome or fairy lives in this house? Does the gnome or fairy have any pets or special animal friends? What is the house made of (leaves, sticks, mushrooms, magical)? Are there special doors, windows, or stairs to this house? What does the furniture in the house look like? Does this house have a special feature, like a baloney, a look out, or a secret room? Where is the fairy house located? Is it in a forest, by a river, or in your own garden? Why kind of garden or car does the fairy or gnome have? What does the land around the house look like? Why happens in a typical day for the fairies who live there? What could be adde to this picture with more time? Are there other creatures or neighbors who live nearby? How fun would it be to live in a pumpkin, acorn, squash, or truck of a tree?"
Lesson Activities
1. Use observational drawing techniques (composition, direct light, value) to draw the basic parts (roof, windows, door, base) of the fairy house drawings
2. Add shape variation (geometric, organic, free form) to add details (windows, doorways, balconies) to the positive space (foreground) of the fairy house drawings
3. Add shape variation (geometric, organic, free form) to add details (trees, dirt path, puddles) to the negative space (background) of the Fairy House Drawings
Day Two, Art Start
1. Retrieve Fairy House Drawings for Assigned Tables
2. Mr. Big Feet's House (2015) Cindy Dauer

3. Discussion Questions "What natural materials are suitable for building fairy houses? What are some famous examples of biomorphic architecture? How does the shape of the house reflect the inhabitants? What magical elements would be in this home? How does your design tell a story about the fairy who lives there? How would different materials create different textures and moods? What special features would a fairy need in this home? What kind of fairy lives in this home and how does personality influence design? How does the house blend in with its environment? What types of lines and shapes are present in your house? How does color help create a mood or atmosphere for the fairy house? If we were to look at your fairy house from a different angle, what would we see? How are details like windows, doors, and roofs designed to be functional or imaginative? What was the most challenging part of designing and building your fairy house?"
Lesson Activities
1. Use types of pattern (stripes, swirls, meanders) to fill in the positive space (foreground, house) of the fairy house drawings
2. Add high contrast (shaded areas, shadows) and light/medium contrast (background, light areas, middle ground) to the white space of the fairy house drawings
3. Add embellishments (fabric, gems, rhinestones) to the positive space (foreground, house) of the Fairy House Drawings
Day Three, Art Start
1. Retrieve Fairy House Drawings for Assigned Tables
2. Set Up Studio Area (colored pencils, sharpie markers, watercolor, oil pastels, gel pens)
Lesson Activities
1. Use color combinations (analogous, secondary, neutral) to fill in the positive space (foreground, house) of the fairy house drawings
2. Use color combinations (analogous, secondary, neutral) to fill in the negative space (background, landscape) of the fairy house drawings
3. Add additional types of pattern (stripes, swirls, meanders) to the negative space (background, landscape) of the Fairy House Drawings
Artist Examples


 Student Examples


Tuesday, October 15, 2024
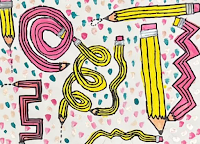
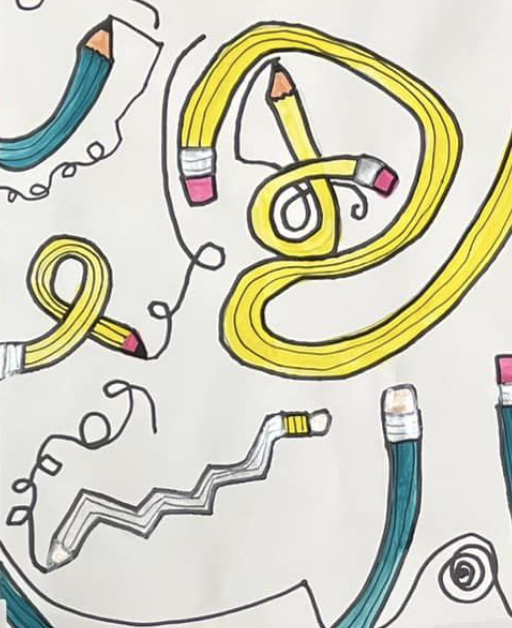
CRAZY BENDABLE PENCIL DRAWINGS
Crazy Bendable Pencil Drawings Learning Targets

I can...
- Create an original Crazy Bendable Pencil Drawing using drawing techniques learned in class
- Use line types (horizontal, vertical, diagonal), shape variation (geometric, organic, are form), and texture (actual, visual, implied) inspired by American Artist/Educator (1977-Present) Ken Vieth
- Use drawing techniques (texture, shading, proportion, perspective) and design principles (composition, movement, variation) based on Art Publications
- Define Pencil (a writing or drawing tool made of graphite encased in wooden, metal, or plastic cylinder)
Lesson One
Day One, Art Start
1. Oldest Pencil In The World (1630) Faber Castell

2. Read From Ordinary To Extraordinary: Art And Design Problem Solving by Ken Vieth

3. Discussion Questions "Did you know the pencil was a lump of lead used for drawing and planning manuscripts in the Middle Ages? Did you know graphite was not discovered in Europe until the 15th century? Did you know that the modern pencils came from an ancient Roman writing instrument called a stylus? Did you know the Aztecs used graphite as a marker for hundreds of years? Did you know Germany was one of the first companies to mass produce pencils worldwide? Did you know Renaissance Artist and Inventor Leonardo Da Vinci frequently sketched in pencil? What types of lines can you make with a pencil?"
Lesson Activities
1. Choose 12" X 15" Drawing Paper
2. Draw three thumbnail sketches of pencils using observational drawing skills (outline, contour, continuous) for pencil drawings
3. Add details (shadows, highlights, movement lines) to the negative space (background) of the Crazy Bendable Pencil Drawings
Day Two, Art Start
1. Retrieve Crazy Bendable Pencil Drawings for Assigned Tables
2. Twisty Pencils In Yellow (2020) Jenny Koland

3. Discussion Questions "Could you imagine a day without pencils? If you could invent a new pencil, what would it be named? What would you do if you had no pencils? What memories or experiences do you have of using pencils as a child? What can pencils be used for? What do you think of this artwork? Why would a drawing be considered more original than a print of the same work? Do you consider graphite and conte crayon museum quality materials? How does this artwork use movement? What is interesting about this artwork? How has the work of the artist evolved overtime?"
Lesson Activities
1. Use drawing techniques (contour, outline, continuous) to add basic shapes (cylinder, cone, sphere) of the pencils for the pencil drawings
2. Use design principles (composition, variation, movement) to fill in the positive space (pencil) of the pencil drawings
3. Use drawing techniques (contour, outline, continuous) to add details (shadows, highlights, thick lines, thin lines) to the Crazy Bendable Pencil Drawings
Day Three, Art Start
1. Retrieve Crazy Bendable Pencil Drawings for Assigned Tables
2. Set Up Studio Area (sharpie markers, colored pencils, pencils)
Lesson Activities
1. Use color combinations (secondary, primary, analogous) to fill in the positive space (pencil) of the pencil drawings
2. Use color combinations (secondary, primary, analogous) to fill in the negative space (background) of the pencil drawings
3. Add design details (overlapping, enlarging, cropping) to the negative space (background) of the Crazy Bendable Pencil Drawings
Artist Examples


 Student Examples




Saturday, February 22, 2020
FUNCTIONAL TWELVE PIECE CHECKERS
Functional Twelve Piece Checkers

Learning Targets
I can...- Create an original Functional Twelve Piece Checkers using drawing techniques learned in class
- Use complimentary colors (red, green; blue, orange; purple, yellow), form (two-dimensional, three-dimensional), and space (positive, negative) inspired by Mastering Creativity: Break Through Your Mental Blocks, Uncover Your Hidden Creative Genius, and Make Brilliance A Habit by James Clear
- Use ceramic techniques (slab method, coil method, sphere method) and design principles (movement, repetition, proportion) based on Functional Art
- Define Fair Play (respect for rules or equal treatment of everyone)
Lesson One
Day One, Art Start
1. Children's Games (1560) Pieter Bruegel

Lesson Activities
1. Use grid paper to add line types (horizontal, vertical) to draw the checkerboard for the Functional Twelve Piece Checkers2. Use complimentary colors (red, green; blue, orange; yellow, purple) to fill in the positive space of the checkerboard of the Checker Set
3. Use complimentary colors (red, green; blue, orange; yellow, purple) to fill in the negative space of the checkerboard of the Checker Set
Day Two, Art Start
1. Retrieve Functional Twelve Piece Checkers for Assigned Table2. Pianist and Checker Players (1924) Henri Matisse

Lesson Activities
1. Use modeling tools (wooden chips, shells, pencils, stamps) to design the twelve pieces of the Checker Set2. Add embellishments (glitter, sequins, small beads, yarn, charms) to design of the twelve pieces of the Checker Set
3. Add patterns (swirls, dots, stripes) to the positive space (top) of the twelve piece designs of the Functional Twelve Piece Checkers
Day Three, Art Start
1. Retrieve Functional Twelve Piece Checkers for Assigned Table2. Set Up Studio Area (place mats, paint brushes, glaze)
Lesson Activities
1. Use complimentary colors (red, green; blue, orange; yellow, purple) to fill in the positive space (twelve pieces) of the Checker Set2. Use complimentary colors (red, green; blue, orange; yellow, purple) to fill in the negative space (twelve pieces) of the Checker Set
3. Apply gloss finish to the Twelve Pieces of the Functional Twelve Piece Checkers
Artist Examples


 Student Examples


 Posts
Posts

