Thursday, November 13, 2025
GEOMETRIC PORTRAITS
Geometric Portraits

Learning Targets
I can...
- Create an original Geometric Portrait using drawing techniques learned in class
- Use shape variation (geometric, organic, free form), color combinations (analogous, warm colors, cool colors), and space (positive, negative) inspired by American Artist (2009-Present) Alison Kunath
- Use low poly techniques (modeling, rendering, sharp angles, flat colors) and design principles (repetition, composition, proportion) based on Abstract Art
- Define Faceted Mosaic Style (a contemporary approach where small pieces are arranged to create an image with a geometric appearance)
Lesson One
Day One, Art Start
1. Frida Kahlo (2018) Alison Kunath

2. Read Shapes That Roll by Karen Nagel

3. Discussion Questions "What do you think this portrait communicates about the person? If you could describe the person in one word, based on the portrait, what would it be? What did you learn from looking at other's geometric portraits? How does using shapes to create a portrait differ from drawing a realistic portrait? What would you tell someone about the process for making this portrait? How are you doing to use lines of symmetry, parallel lines, or angles in your work? How did you decide on a final composition and arrangement of shapes? What was the most challenging part of the process? What is your plan for turning basic shapes into a facial feature like an eye or mouth? How does the artist use color to describe the person? What emotions or feelings do different shape and colors create for you? How does the arrangement of shapes help you understand or imagine the person? Are the shapes geometric (hard-edged) or biomorphic (nature)? What types of shapes can you see in this portrait?"
Lesson Activities
1. Choose 24" X 36" Painting Paper
2. Use a protractor, straight edge, and compass to draw line types (horizontal, vertical, diagonal) to help divide each section of the Geometric Portraits
3. Use a protractor, straight edge, and compass to start drawing the positive space (facial features, accessories, foreground) of the Geometric Portraits
Day Two, Art Start
1. Retrieve Geometric Portrait for Assigned Tables
2. Maya Angelou (2017) Alison Kunath

3. Discussion Questions "Can mathematical concepts be a type of artwork? What shapes can you see in your portrait? How did you use the shapes to create the features of the face (eyes, nose, mouth)? Did you use mostly straight or curved lines? Are all the sides of a shape the same length? How can you tell? Can you find any patterns or symmetry in your artwork? How did noticing the shapes help you create your portrait? What part of the portrait is the main focus (focal point)? How does the placement of shape help to create balance in the picture? Does it look like we are looking up at the person, looking down at them, or looking straight across? Are some shapes layered on top of others? What effect does that have? How did you use the background space? Does it have shapes too or is it plain? What words would you use to describe the style of your portrait (vibrant, serious, playful, complex)?"
Lesson Activities
1. Fill in the positive space (facial features, accessories, foreground) with color combinations (analogous, warm colors, cool colors) for the Geometric Portraits
2. Fill in the negative space (background) with color combinations (analogous, warm colors, cool colors) for the Geometric Portraits
3. Write personal signature with color combinations (analogous, warm colors, cool colors) in the positive space (facial features, accessories, foreground) of the Geometric Portraits
Day Three, Art Start
1. Retrieve Geometrie Portraits for Assigned Tables
2. Set Up Studio Area (acrylic paint, paint brushes, paint bucket)
Lesson Activities
1. Add details (line types, patterns, designs) with color combinations (analogous, warm colors, cool colors) in the positive space (facial features, accessories, foreground) of the Geometric Portraits
2. Use highlights (reflective light, light source) to fill in the positive space (foreground, middle ground, portrait) of the Geometric Portraits
3. Use shadows (cast shadow, reflective shadow, shadow) to fill in the negative space (background) of the Geometric Portraits
Artist Examples


 Student Examples


Saturday, February 17, 2018
CERAMIC FACE JUGS
Ceramic Face Jugs

Learning Targets
I can...- Create a Face Jug using ceramic techniques learned in class
- Use form (three dimensional, two dimensional), shape (biomorphic, anthropomorphic), and texture (engraved, carved) inspired by American Potter (1801-1870) Dave Drake
- Use multicultural connections (ceramic traditions, 19th century customs, sacred relics) and design principles (balance, composition, contrast) relating to African American (1860-1865) Folk Art
- Define Artifact (object or item made by a human of cultural or historical interest)
Lesson One
Day One, Art Start

Lesson Activities
Day Two, Art Start

Lesson Activities
Day Three, Art Start
Lesson Activities
Artist Examples


Wednesday, July 12, 2017
MINI LESSON: BACKWARD PORTRAIT
1. Out-LINE the figure, shirt, and layers of hair
2. Use different crayon COLOR for each outline
Example: yellow crayon- hair, purple crayon-shirt, and pink crayon- skin
3. Add ruffles/design in shirt, add a necklace/bracelet, and/or add a hair piece to show TEXTURE
4. COLOR CHOICE: CHOOSE Analogous OR Complimentary Colors
A. Use Analogous Colors: Colors Next to Each Other on Color Wheel
- Example: red, orange, and yellow OR green, blue, and purple
- Example red and green; orange and purple; yellow and blue
5. Use ONE-TWO color (watercolor wash) for each area: skin, hair, and shirt (positive space) and background (negative space)
MINI LESSON: STICKS & STONES MAY BREAK MY BONES BUT WORDS
DAY ONE
Art Start:
- Retrieve Sketchbook from Cubby
- Write your Future Self A Letter
What goals do you have for yourself?
What would be your dream (1) career (2) house (3) car?
What advice would you give yourself? About friendship, family, relationships, etc.?
Lesson Activities:
- What Does Your Handwriting Say about You? Discussion
- Typography Art Demonstration
MINI LESSON: DOES ART HAVE SOUL?
Art Start
1.Retrieve Sketchbook2. Read What does it mean to Have Soul?
3. Answer 2 Highlighted Questions
Lesson Activities:
1. Introduction- Miss Robinson2. Calendar Overview- What Will We Be Doing For A Month?
3. Group Discussion- What Does Respect Look Like?
4. Demonstration- Abstract Soul Piece
Substitute Expectations:
-Remain In Seat-Use "cafe" Quiet Voice
-Listen To Instruction
-Clean up
MINI LESSON: SUNSETS & SILHOUETTES
Sunsets & Silhouettes
Learning Objectives:
- Create a photomontage (collage) of who you believe the model might be.
- DAY ONE: Create a Background (sky, mountain, forest)
- DAY TWO: Create a Silhouette Figure (place on top of background)
Day One:
Art Start:
1. Retrieve Sketchbook2. What do you think the word PHYSIOGNOMY means? Explain why. (5 mins)
Lesson Activities:
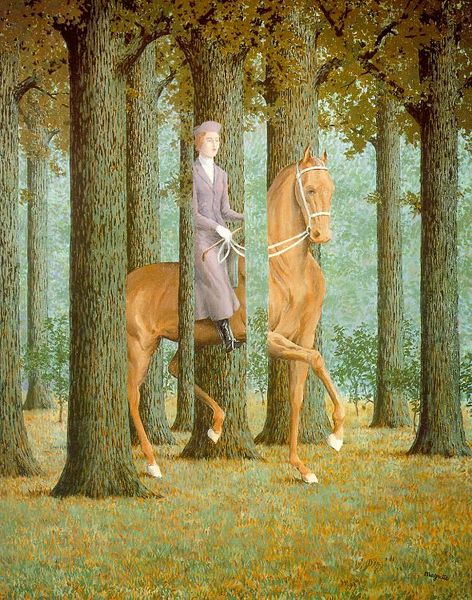
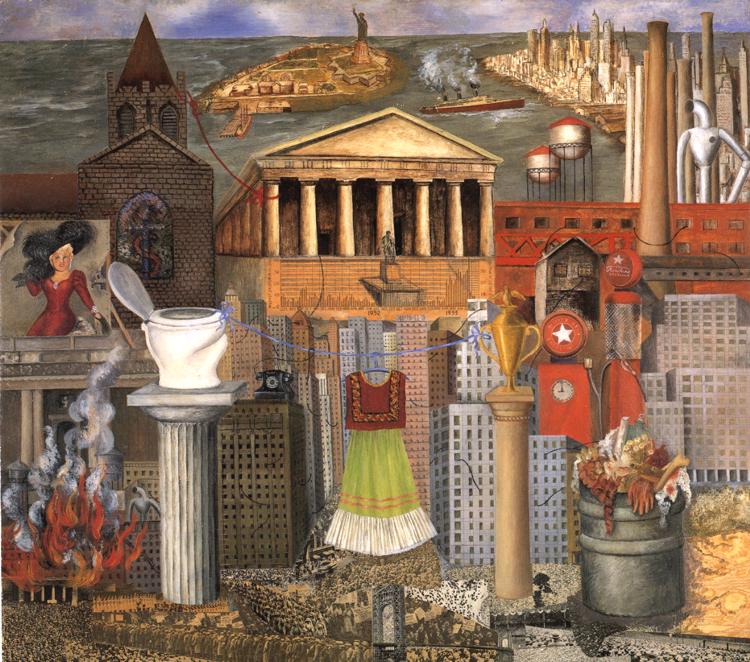
1. Group Discussion: Should we judge people by ones outer appearances? Is it ever appropriate to judge someone by their outer appearance? Yes OR No. (10 mins)Famous Surrealist Artists: Salvador Dali, Frida Kahlo, Rene Magritte

3. Demonstration: Creating a Surrealist Background (10 mins)
Step-By Step Pictures
 2.
2. 3.
3.

Day Two:
Art Start:
1. Retrieve Sketchbook2. Finish Background of Photomontage (Collage) (10 mins)
Lesson Activities:
- Read Creating Surreal Figures pg 14-15
- Group Discussion: What similarities or differences do you notice between your work and the surrealists (artists) you learned about? (5 mins)
Current Local Artist: Erin Case Silhouette Artist


Step-By-Step Pictures:


 5.
5.
Student Examples


4. Clean Up (10 mins)
Lesson Expectations:
Substitute Expectations:
-Remain in Seat-Use "cafe" voice (quiet voice)
-Listen to Instructions
-Clean Up
Artwork Expectations:
Background (Day One):
Foreground (animals, objects)
Figure (Day Two):
-Cut Around the Figure-Due End of Hour
MINI LESSON: HENRI ROUSSEAU ART STATIONS & PAINTINGS
Henri Rousseau Art Stations & Paintings

Day One, Art Start
- Retrieve Sketchbook
- Find A writing utensil
- Examples: pen, pencil, colored pencil
- Write Name and Hour on Blue Paper
- Read Blue Paper (Find Out about Henri Rousseau)
Lesson Activities:
- Art Station Expectations
- Review the Different Art Stations
- I-Pad Station
- Video Station
- Henri Rousseau Research Station
- Building a Landscape Station
- Art Style Station
Day Two, Art Start
1. Retrieve Sketchbook
2. Find a writing utensil
- Examples: pen, pencil, colored pencil
Lesson Activities:
1. Review Art Station Expections2. Review the Different Art Stations
- I-Pad Station
- Video Station
- Henri Rousseau Research Station
- Building a Landscape Station
- Art Style Station
Exit Ticket: What did you learn about Henri Rousseau today?
- What did you learn about landscape paintings today?
Day Three, Art Start
1. Retrieve your Sketchbook- Examples: pictures, magazine clippings, smart device images
Lesson Activities:
- Examples: animals, balloons, planes, plants
- Four to Six Reference Pictures (sky; ground-base; animal or figure)
3.Retrieve additional resources at different stations
- Example: pictures, magazines, devices
Day Four, Art Start
1. Retrieve your sketchbook2. Retrieve photo resource image
3. Pull out smart device
Lesson Activities
1. Finish cutting and gluing photomontage resources2. Retrieve Ipad or Smart Device
3. Photo Editing Demonstration
- Examples:contrast, brightness, saturation
- SAVE and EMAIL image to yourself
Day Five, Art Start
1. Retrieve Sketchbook2. Retrieve Photo Resource Image
Lesson Activities
1.Landscape Painting: Format and Drawing Tips Video2. Use Tracing Paper to draw an outline of your landscape
- Practice drawing photo resource image in sketchbook
- 4X - 4 boxes to edges
3. Approval for painting resources and planning resources
- Transfer sketches to canvas
- Use pencils provided when transferring
Middle School Student Examples


 Posts
Posts

