Showing posts with label mini lesson. Show all posts
Sunday, March 11, 2018
CALDER CONTOUR SELF PORTRAITS
Calder Contour Self Portraits

Learning Targets
I can...- Create a Contour Self Portrait using techniques learning in class
- Use gestural lines (smooth, jagged, curved), shape variation (geometric, organic, free form), and color schemes (complimentary, secondary, primary) inspired by American Sculptor (1976-1998) Alexander Calder
- Use observational skills (value scale, proportion, illusion of depth) and design principles (contrast, harmony, movement) relating to Abstract Expressionism
- Define Portrait (a picture depicting the face, head, and shoulder)
Lesson One
Day One, Art Start
1. Abstract Expressionists (1) Alexander Calder, (2) Elizabeth Berrien, and (3) Gavin Worth


Lesson Activities
1. Choose 9" by 12" Drawing Paper2. Use mechanic pencils to draw face, head, and shoulder of oneself
3. Use black sharpie marker to outline face, head, and shoulder of Contour Self Portraits
Reminder:
- Initials & Home Teacher on Back of Paper
Day Two, Art Start
1. Retrieve Contour Self Portrait for Assigned Table2. Read Alexander Calder by PBS American Masters

Lesson Activities
1. Use printed portrait to outline the face, head, and shoulder with black wire2. Use multicolored wire to add facial features (eyebrows, hair, jewelry) to self portraits
3. Use hot glue to attach face, head, shoulder, and facial features to a cardboard base
Day Three, Art Start
1. Retrieve Contour Line Portrait for Assigned Table2. Set Up Studio Area (black wires, wire cutters, cardboard base)
Lesson Activities
1. Use hot glue to finish attaching face, head, and shoulder to cardboard base2. Use black paint to cover facial features (eyebrows, hair, jewelry) of self portraits
3. Use black paint to cover the cardboard base of the Contour Line Portraits
Teacher Demonstration Examples


Artist Examples


Student Examples


Wednesday, July 12, 2017
MINI LESSON: BACKWARD PORTRAIT
BACKWARD PORTRAIT GUIDELINES:
1. Out-LINE the figure, shirt, and layers of hair
2. Use different crayon COLOR for each outline
Example: yellow crayon- hair, purple crayon-shirt, and pink crayon- skin
3. Add ruffles/design in shirt, add a necklace/bracelet, and/or add a hair piece to show TEXTURE
4. COLOR CHOICE: CHOOSE Analogous OR Complimentary Colors
A. Use Analogous Colors: Colors Next to Each Other on Color Wheel
- Example: red, orange, and yellow OR green, blue, and purple
B. Use Complimentary Colors: Opposite on Color Wheel
- Example red and green; orange and purple; yellow and blue
5. Use ONE-TWO color (watercolor wash) for each area: skin, hair, and shirt (positive space) and background (negative space)
MINI LESSON: STICKS & STONES MAY BREAK MY BONES BUT WORDS
DAY ONE
Art Start:
- Retrieve Sketchbook from Cubby
- Write your Future Self A Letter
What goals do you have for yourself?
What would be your dream (1) career (2) house (3) car?
What advice would you give yourself? About friendship, family, relationships, etc.?
Lesson Activities:
- What Does Your Handwriting Say about You? Discussion
- Typography Art Demonstration
MINI LESSON: DOES ART HAVE SOUL?
Art Start
1.Retrieve Sketchbook2. Read What does it mean to Have Soul?
3. Answer 2 Highlighted Questions
Lesson Activities:
1. Introduction- Miss Robinson2. Calendar Overview- What Will We Be Doing For A Month?
3. Group Discussion- What Does Respect Look Like?
4. Demonstration- Abstract Soul Piece
Substitute Expectations:
-Remain In Seat-Use "cafe" Quiet Voice
-Listen To Instruction
-Clean up
MINI LESSON: SUNSETS & SILHOUETTES
Sunsets & Silhouettes
Learning Objectives:
- Create a photomontage (collage) of who you believe the model might be.
- DAY ONE: Create a Background (sky, mountain, forest)
- DAY TWO: Create a Silhouette Figure (place on top of background)
Day One:
Art Start:
1. Retrieve Sketchbook2. What do you think the word PHYSIOGNOMY means? Explain why. (5 mins)
Lesson Activities:
1. Group Discussion: Should we judge people by ones outer appearances? Is it ever appropriate to judge someone by their outer appearance? Yes OR No. (10 mins)Famous Surrealist Artists: Salvador Dali, Frida Kahlo, Rene Magritte
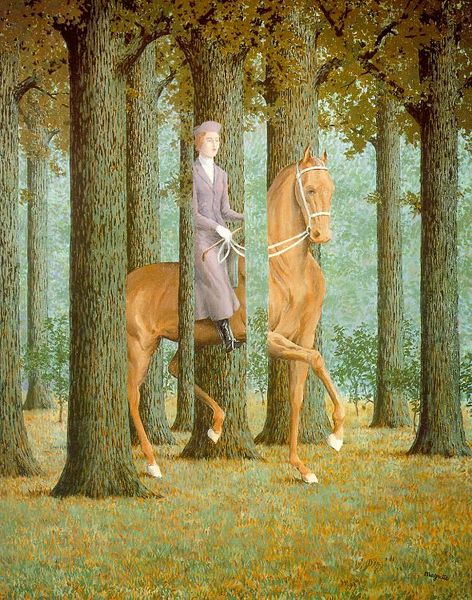
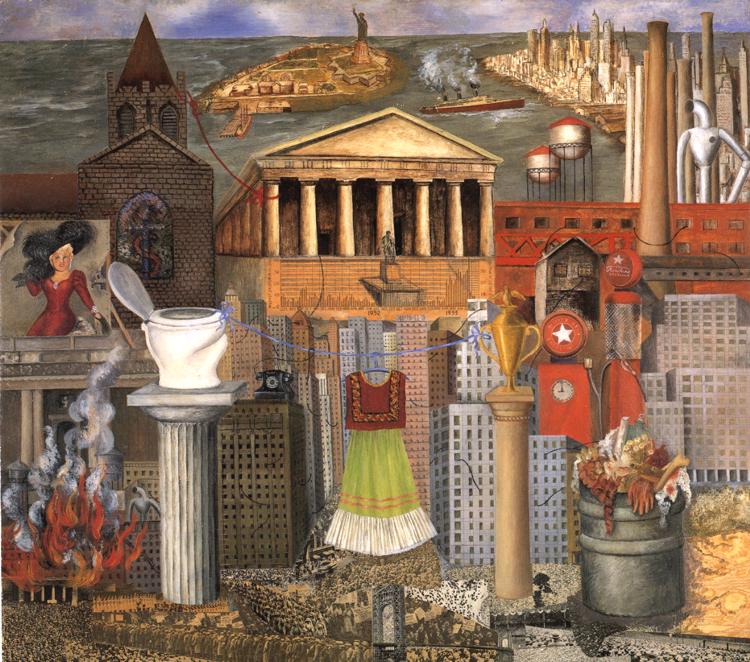

3. Demonstration: Creating a Surrealist Background (10 mins)
Step-By Step Pictures
 2.
2. 3.
3.
5.

Day Two:
Art Start:
1. Retrieve Sketchbook2. Finish Background of Photomontage (Collage) (10 mins)
Lesson Activities:
- Read Creating Surreal Figures pg 14-15
- Group Discussion: What similarities or differences do you notice between your work and the surrealists (artists) you learned about? (5 mins)
Current Local Artist: Erin Case Silhouette Artist


Step-By-Step Pictures:


3. 

4. 5.
5.
 5.
5.
Student Examples


4. Clean Up (10 mins)
Lesson Expectations:
Substitute Expectations:
-Remain in Seat-Use "cafe" voice (quiet voice)
-Listen to Instructions
-Clean Up
Artwork Expectations:
Background (Day One):
-NO Paper Showing
-MUST have Background (sky), Middle ground (mountains, rocks),
Foreground (animals, objects)
Foreground (animals, objects)
-Include an Object (Example: clock, crutch, drawer)
-Take Your Time! Clean Cuts!
Figure (Day Two):
-Cut Around the Figure
-NO Skin Showing (Landscape)
-Take your Time!-Due End of Hour
MINI LESSON: HENRI ROUSSEAU ART STATIONS & PAINTINGS
Henri Rousseau Art Stations & Paintings

Day One, Art Start
- Retrieve Sketchbook
- Find A writing utensil
- Examples: pen, pencil, colored pencil
- Write Name and Hour on Blue Paper
- Read Blue Paper (Find Out about Henri Rousseau)
Lesson Activities:
- Art Station Expectations
- Review the Different Art Stations
- I-Pad Station
- Video Station
- Henri Rousseau Research Station
- Building a Landscape Station
- Art Style Station
Exit Ticket: What did you learn about Henri Rousseau today?
Day Two, Art Start
1. Retrieve Sketchbook
2. Find a writing utensil
- Examples: pen, pencil, colored pencil
Lesson Activities:
1. Review Art Station Expections2. Review the Different Art Stations
- I-Pad Station
- Video Station
- Henri Rousseau Research Station
- Building a Landscape Station
- Art Style Station
Exit Ticket: What did you learn about Henri Rousseau today?
- What did you learn about landscape paintings today?
Day Three, Art Start
1. Retrieve your Sketchbook
2. Get out your reference materials
- Examples: pictures, magazine clippings, smart device images
Lesson Activities:
1. Take out other reference material and cut out things you want to put on the landscape
- Examples: animals, balloons, planes, plants
- Four to Six Reference Pictures (sky; ground-base; animal or figure)
2. Photomontage Demonstration
3.Retrieve additional resources at different stations
3.Retrieve additional resources at different stations
- Example: pictures, magazines, devices
4. Glue cut out images onto the photo resource image where you want them
5. Place photo resource image in your art journal
Day Four, Art Start
1. Retrieve your sketchbook2. Retrieve photo resource image
3. Pull out smart device
Lesson Activities
1. Finish cutting and gluing photomontage resources2. Retrieve Ipad or Smart Device
3. Photo Editing Demonstration
- Examples:contrast, brightness, saturation
- SAVE and EMAIL image to yourself
Day Five, Art Start
1. Retrieve Sketchbook2. Retrieve Photo Resource Image
Lesson Activities
1.Landscape Painting: Format and Drawing Tips Video2. Use Tracing Paper to draw an outline of your landscape
- Practice drawing photo resource image in sketchbook
- 4X - 4 boxes to edges
3. Approval for painting resources and planning resources
- Transfer sketches to canvas
- Use pencils provided when transferring
Middle School Student Examples


Subscribe to:
Posts
(
Atom
)


 Posts
Posts

