Showing posts with label Jim Dine. Show all posts
Thursday, March 26, 2020
JIM DINE METAL TOOLS
Jim Dine Metal Tools

Learning Targets
I can...- Create an original Jim Dine Metal Tools using drawing techniques learned in class
- Use neutral colors (black, brown, grey, silver), texture types (actual, implied, visual), and line variation (horizontal, vertical, diagonal) inspired by American Pop Artist (1935-Present) Jim Dine
- Use printmaking techniques (overlapping, cropping, arrangement) and design principles (balance proportion, gradation) based on Pop Art
- Define Frottage (rubbing an uneven surface for the basis of a work of art)
Lesson One
Day One, Art Start
1. Five Feet of Colorful Tools (1962) Jim Dine

Lesson Activities
1. Choose 12" X 15" Drawing Paper2. Add three dimensional shapes (cylinder, pyramid, sphere) to composition of arranged objects (scissors, wrench, screw driver) of tool drawings
3. Use charcoal to add line types (thick, thin) to composition of arranged objects (scissors, wrench, screw driver) of tool drawings
Day Two, Art Start
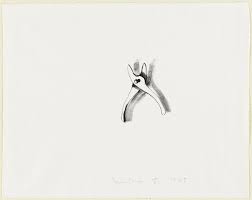
1. Retrieve Jim Dine Metal Tools for Assigned Table2. Pliers 2 (1969) Jim Dine
Lesson Activities
1. Use neutral colors (black, grey, brown) to fill in the positive space (arrange objects) of the Jim Dine Metal Tools2. Use neutral colors (black, grey, brown) to fill in the negative space (background) of the Jim Dine Metal Tools
3. Use printmaking techniques (overlapping, cropping, arrangement) to fill in the negative space (background) of the Jim Dine Metal Tools
Day Three, Art Start
1. Retrieve Jim Dine Metal Tools for Assigned Table2. Set Up Studio Area (charcoal, pencil, eraser, sharpener)
Lesson Activities
1. Add highlights (reflective light, light source) to subject matter (arranged objects) of Jim Dine Metal Tools2. Add shadows (cast shadow, shadow) to negative space (background) of Jim Dine Metal Tools
3. Outline details (pattern, arrangement, paint splatter) to positive space (arranged objects) of Jim Dine Metal Tools
Artist Examples


Student Examples


Friday, February 9, 2018
JIM DINE HEARTS
Jim Dine Hearts

Learning Targets
I can...- Create a Jim Dine Heart using mixed media techniques learned in class
- Use warm/cool colors (red orange yellow; green blue purple), texture (camouflage, decoupage, painterly), and space (positive, negative, foreground, background) inspired by Pop Artist (1935-Present) Jim Dine
- Use social studies connections (emotional response, common objects) and design principles (repetition, variation, balance) relating to Neo-Dada Movement
- Define Expressive (convey a thought or feeling through a picture)
Lesson Activities
Day One, Art Start
1. The Technicolor Heart (2011) Jim Dine at Fredrick Meijer
2. Read Jim Dine: Modern Master Series by Jean E. Feinberg

3. Discussion Questions "What does this artwork make you feel? If the artwork were only a shade of red, would it be as interesting? How do you think he created this piece? Why do you think he chose these items to represent himself? Why do you think he continues to repeat the same everyday objects like tools, robes, paint palettes, and hearts? What does his work mean? Could we create a story about it?"
Lesson Activities
1. Choose a 9" by 9" White Paper2. Use a template to trace a geometric shape (heart) in the center of the Paper
3. Use white paint to fill in the positive space of the Jim Dine Heart
Day Two, Art Start
1. Retrieve Jim Dine Heart for Assigned Table2. Confetti Heart (1985) Jim Dine

Lesson Activities
1. Use different brushstrokes to overlap colors within the positive space (heart)2. Use different brushstrokes to overlap colors within the negative space (background)
3. Use black acrylic paint to outline the geometric shape (heart)
Day Three, Art Start
1. Retrieve Jim Dine Heart for Assigned Table2. Set Up Studio Area (paintbrushes, paint, water buckets)
Lesson Activities
1. Use toothbrushes to splatter black paint within the positive space (heart)2. Use toothbrushes to create a border around the negative space (background)
3. Use Mod Podge to add a protective coating over the Jim Dine Heart
Artist Examples


Student Examples


Subscribe to:
Comments
(
Atom
)


