Thursday, October 29, 2026
HEART LOLLIPOPS
Heart Lollipops Learning Targets

I can...
- Create an original Heart Lollipops using drawing techniques learned in class
- Use color combinations (warm/cool colors, analogous colors, monochromatic), shape variation (geometric, organic, free form), and value (lightness, darkness, tints, shades) inspired by American Artist (1920-2021) Wayne Thiebaud
- Use observational drawings (proportions, perspective, sighting, quality) and design principles (composition, proportion, balanced) based on American Art
- Define Subject Matter (the visual material, object, person, place, or event that the artwork depicts)
Lesson One
Day One, Art Start
1. Seven Suckers (1920) Wayne Thiebaud

2. Read Henry's Lollipop by Robert Quackenbush

3. Discussion Questions "What makes a candy look real or shiny in a painting? How did Wayne Thiebaud make a flat piece of candy look like it has weight, roundness, and a halo of bright light? How does the artist make these candies look real enough to eat? How can artists turn an everyday object into an interesting work of art? Can you think of an artist that uses everyday objects in artwork? How can you make your lollipop large enough to become the focal point? Which colors remind you of Valentines Day? How can artists use color, shape, and pattern to express love and kindness through art? How can we make our artwork unique while exploring a shared theme? What flavor or color makes you think of love and happiness? Do you want think to look like a tiny candy or a giant cartoon heart? How does liquid sugar turn into a hard candy stick?"
Lesson Activities
1. Choose 12" X 15" Drawing Paper
2. Use graphite pencil to draw shape variation (geometric, organic, free form) for the positive space (foreground, middle ground, lollipop) of the Heart Lollipops
3. Use graphite pencil to draw line types (horizontal, vertical, diagonal) for the positive space (foreground, middle ground, lollipop) of the Heart Lollipops
Day Two, Art Start
1. Retrieve Heart Lollipops for Assigned Tables
2. Little Red Suckers (1971) Wayne Thiebaud

3. Discussion Questions "What types of lollipops are there? Where are these lollipops? How are the lollipops displayed? How is the painting drawn? How many layers does this lollipop consist of? Which of the choices below are the smallest lollipops? What types of lollipops do you like? What is the shape of your lollipops? How would you decorate your lollipop? What colors are used for this type of lollipop? What materials did Wayne Thiebaud use? Who was Wayne Thiebaud influenced by? What color schemes does he use analogous, complementary, or secondary? How do you think these lollipops would feel? How do the shadows help this artwork to look real? What is the painting about? What is the mood in this artwork?"
Lesson Activities
1. Use oil pastels to fill in the positive space (foreground, middle ground, lollipops) with color combinations (analogous, complementary, secondary) for the Heart Lollipops
2. Use oil pastels to fill in the negative space (background) with color combinations (analogous, complementary, secondary) for the Heart Lollipops
3. Add details (background, decorations, wallpaper) to the negative space (background) of the Heart Lollipops
Day Three, Art Start
1. Retrieve Heart Lollipops for Assigned Tables
2. Set Up Studio Area (paintbrushes, tempera paint, water buckets, crayons)
Lesson Activities
1. Add highlights (light source, reflective light, highlight) to the positive space (foreground, middle ground, lollipops) of the Heart Lollipop
2. Add shadows (cast shadow, reflective shadow, shadows) to the negative space (background) of the Heart Lollipop
3. Add embellishments (glitter, beads, ribbons) to details (background, decorations, wallpaper) of the Heart Lollipops
Artist Examples


 Student Examples


Wednesday, August 20, 2025
PUMPKINS ON PLAID BLANKETS
Pumpkins On Plaid Blankets

Learning Targets
I can...
- Create an original Pumpkins On Plaid Blankets using collage techniques learned in class
- Use line types (horizontal, vertical, diagonal), shape variation (geometric, organic, free form), and value (lightness, darkness, tone) inspired by Contemporary Artist (1929-Present) Yayoi Kusama
- Use shading techniques (tone, darkness, lightness, depth) and design principles (composition, repetition, balance) based on Contemporary Art
- Define Pipette Painting (an art technique where liquid paint is applied to a surface using a dropper instead of traditional brush)
Lesson One
Day One, Art Start
1. Pumpkin (2018) Yayoi Kusama

2. Read The Runaway Pumpkin by Kevin Lewis

3. Discussion Questions "Does this pumpkin symbolize abundance, harvest to transformation, or playfulness? How was the pumpkin significant in different art movements? How does this painting, with its quiet simplicity, offer insight into how art can serve as a form of resilience or refuge during dark times? What does it suggest about how art reflects emotional and historical realities? How can we apply this idea to other areas of life or creative expression? In what ways can simplicity and calmness be forms of resistance to suffering? How might this reflect the artists view of the world? Can you think of other ways artists (writers, filmmakers) use everyday objects to explore bigger ideas like time, mortality, or beauty? How does knowing about the artists personal life change the way you view these pumpkins?"
Lesson Activities
1. Use geometric shapes (oval, circle, rectangle) to draw an assorted vegetable (pumpkin, onion, squash) for the pumpkin collages
2. Use geometric shapes (oval circle rectangle) to draw details (stems, leaves, table) for the pumpkin collages
3. Use line types (horizontal, vertical, diagonal) to draw the positive space (pumpkin) and details (stem, leaves, table) of the Pumpkins On Plaid Blankets
Day Two, Art Start
1. Retrieve Pumpkins On Plaid Blankets for Assigned Tables
2. Red Colored Pumpkin (1994) Yayoi Kusama

3. Discussion Questions "If you had to paint something from your own background or daily life, what would you choose? How does art help us celebrate ordinary things? What emotions or ideas do you think this artist is trying to express with these choices? How does this painting challenge traditional still-life paintings you have seen before? What makes it feel more modern or different? What objects from nature would you choose to paint or draw to show themes of growth or life? How do you think color alone can make us think of objects or seasons, even if they are not there? How does the artist use lines and colors to represent a well-known object? How does the use of subtle colors change the mood of the painting? Why do you think artists' styles change over time? Can you think of an example of an artist, musician, or write whose style has changed as they have gotten older or experienced new things?"
Lesson Activities
1. Use line types (horizontal, vertical, diagonal) to add details (stems, leaves, vines) to the positive space (pumpkins, foreground) of the pumpkin collages
2. Use oil pastels to fill in the positive space (pumpkins, foreground) with neutral colors (black, grey, white) for the pumpkin collages
3. Use oil pastels to fill in the negative space (background, blanket) with neutral colors (black, grey, white) for the Pumpkins On Plaid Blankets
Day Three, Art Start
1. Retrieve Pumpkins On Plaid Blankets for Assigned Tables
2. Set Up Studio Area (tempera paint, paint brushes, water buckets)
Lesson Activities
1. Add pumpkin parts (brown stem, green leaves, vines) with neutral colors (black, white, grey) for pumpkin collages
2. Use texture techniques (eraser, cloth, sponge) to add details (stems, green leaves, vines) for the pumpkin collages
3. Add highlights (reflective light, light source) and shadows (cast shadow, shadow) to the negative space (background) of the Pumpkins On Plaid Blankets
Artist Examples


 Student Examples


Thursday, December 19, 2024
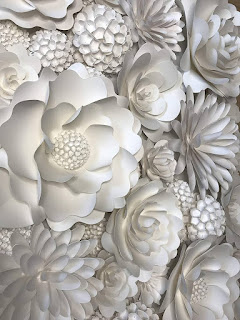
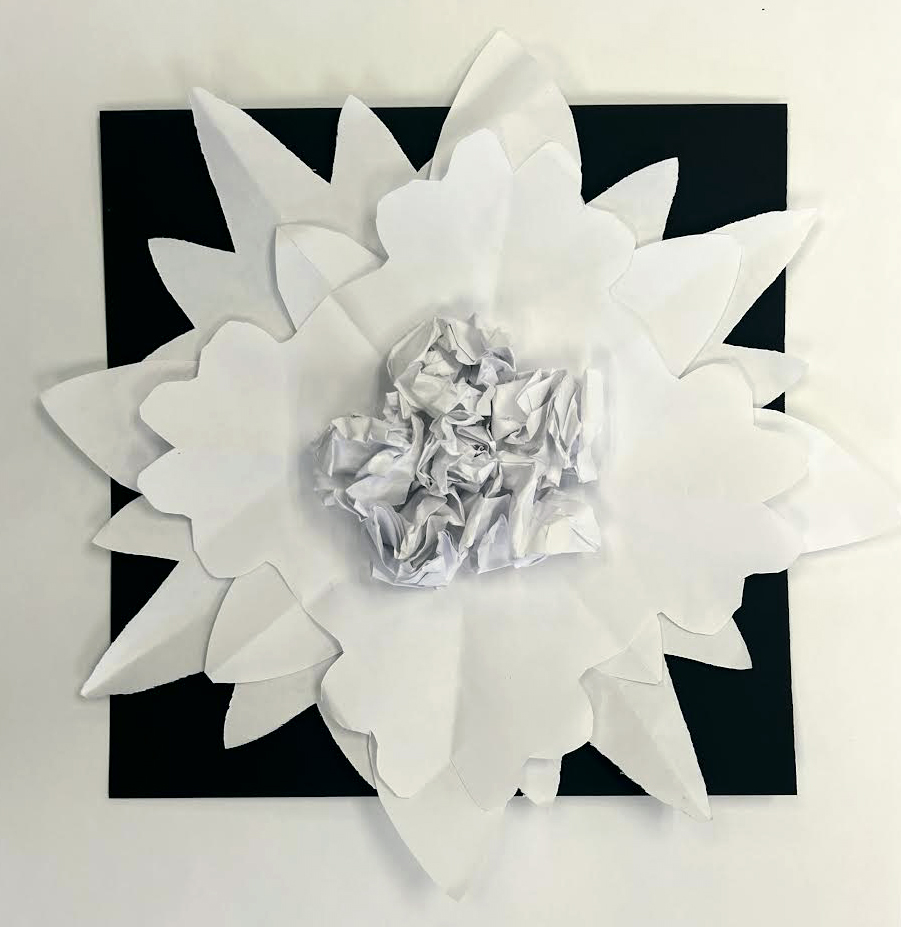
PAPER FLOWER SCULPTURES
Paper Flower Sculptures

Learning Targets
I can...
- Create an original Paper Flower Sculptures using sculpture techniques learned in class
- Use shape variation (geometric organic free form), form (two dimensional, three dimensional), and texture (actual visual implied) inspired by American Sculptor (1998-Present) Kirsten Hassenfeld
- Use paper techniques (folding tearing bending curling) and design principles (proportion composition movement) based on American Art
- Define Curvesto (to create shadows within the sculpture)
Lesson One
Day One, Art Start
1. In The Moon (2007) Kirsten Hassenfeld

2. Read Have You Ever Seen A Flower by Shawn Harris

3. Discussion Questions "How do artists use paper, a two-dimensional object, to create a three-dimensional sculpture using a series of techniques? What do you think are important features of a flower and what shapes do these features take in your mind? Why are flowers such as Van Gogh's Sunflowers to Georgie O'Keefe series a favorited subject among painters? How does the artistic process parallel the development of a flower? How do visual methods help you better understand the functions of each plant part? After learning these visual art terms such as symmetry and balance, how do they contribute to the structure of a flower? How do you see the flowers functioning in a positive manner on these parade floats? What was the key thing you needed to keep in mind when creating your own sculpture? What did you find challenging about your artwork?"
Lesson Activities
1. Choose 12 X 12 Colored Construction Paper
2. Use three compositional elements (shape color texture) to select a flower to represent a memory, place, or event for flower sculptures
3. Use line variation (wavy, straight, curved) as a design principles (balance, movement, repetition) within the flower sculptures
Day Two, Art Start
1. Retrieve Paper Flower Sculptures for Assigned Tables
2. Blue Horn (2010) Kirsten Hassenfeld

3. Discussion Questions "Who is the artist of each sculpture? What do you know about him or her? what is the subject matter? When was this sculpture completed for and for whom (if known)? What medium was it done with? Why was it made, is it known? For what purpose or use does the sculpture have? How are these sculptures similar or different? What feeling do each of these sculptures reveal about the artist and style? What does these sculptures reveal about the artist? What does this piece reveal about the society in which they were created? What does this sculpture represent? What do you hink is happening in this sculpture? What action do you see and how does it contribute to the feeling of this piece? How is the artist telling us a story?"
Lesson Activities
1. Use compasses, protractors, and texture plates to add symmetrical shapes (circle, triangle, square) and expressive lines (straight, curved, swirling) to the paper flower sculptures
2. Use neutral colors (black, white, grey) to fill in the negative space (background) of the paper flower sculptures
3. Use neutral colors (black, white, grey) to fill in the positive space (foreground) of the Paper Flower Sculptures
Day Three, Art Start
1. Retrieve Paper Flower Sculptures for Assigned Tables
2. Set Up Studio Area (construction paper, clear tape, pencils, tempera paint)
Lesson Activities
1. Use scissors to cut out two dimensional symmetrical shapes (circle, triangle, rectangle) to create a three dimensional shape paper flower sculptures
2. Glue down three dimensional symmetrical shapes (cylinder, sphere, cone, pyramid) to create a three dimensional shape paper flower sculptures
3. Use sharpie markers to add beautiful patterns (hearts, stripes, swirls) within the positive space (flower) of the Paper Flower Sculptures
Artist Examples

 Student Examples



Wednesday, October 16, 2024
SARI SHYRACK INSPIRED DISCO BALLS
Sari Shyrack Inspired Disco Balls Learning Targets

I can...
- Create an original Sari Shyrack Inspired Disco Ball using drawing techniques learned in class
- Use shape variation (two dimensional, three dimensional), monochromatic colors (light blue, blue, dark blue), and value (lightness, darkness, highlights, shadows) inspired by Contemporary Painter (1991-Present) Sari Shyrack
- Use painting techniques (color theory, light reflection, pattern design) and design principles (repetition, contrast, proportion) based on Contemporary Art
- Define Sphere (a three-dimensional object that is perfectly round)
Lesson One
Day One, Art Start
1. Orange Dreamsicle (2024) Sari Shyrack

2. Read Dinosaur Disco by Deborah Kelly

3. Discussion Questions "Have you ever seen a disco ball at a skating rink? What is color theory? What an amazing opportunity to make the new year sparkle than a brand-new disco ball painting? How can you bring in a new year with a burst of creativity and positive energy? Do you know how to twirl, spin, and sparkle to the music? How will you dance into the new year? What do you think of when you hear the word disco? What are some music gatherings you have attended? When do people most want to dance? How do you feel when you are dancing? What does dancing accomplish? What popular film is associated with disco?"
Lesson Activities
1. Choose 12" X 15" Painting Paper
2. Draw one basic form (sphere) before adding value (lightness, darkness, highlights, shadows) within the disco ball paintings
3. Add movement lines (horizontal, vertical, diagonal) in the negative space (background) of the Sari Shyrack Inspired Disco Balls
Day Two, Art Start
1. Retrieve Sari Shyrack Inspired Disco Balls for Assigned Tables
2. Raspberry Lemonade Disco Ball (2024 )Sari Shyrack

3. Discussion Questions "What is integral to the work of an artist? What role does an artist have in society? How does practicing artwork help artists change overtime? What artwork do you most identify with? What is your favorite artwork? What type of artwork do you most enjoy doing? Why is art important to you? What do you like about you artwork? Why are the names of the three artists you have been compared to? What was your first reaction to this artwork? How would you describe this painting to a person who could not see it?"
Lesson Activities
1. Use monochromatic colors (light blue, blue, dark blue) to fill in the positive space (sphere) of the disco ball paintings
2. Use monochromatic colors (light blue, blue, dark blue) to fill in the negative space (background) of the disco ball paintings
3. Use felt tip pens to add neutral colors (black, grey, white) to the positive space (disco ball) and negative space (background) of the Sari Shyrack Inspired Disco Balls
Day Three, Art Start
1. Retrieve Sari Shyrack Inspired Disco Balls for Assigned Tables
2. Set Up Studio Area (water bucket, paint brushes, pencils)
Lesson Activities
1. Add tints (add white, reflective light, light source) to subject matter (cone, cylinder, sphere, cube) to form the disco ball paintings
2. Add shades (add black, cast shadows, shadow) to the negative space (background) of the disco ball paintings
3. Use drawing tools (pencils, oil pastels, chalk) for the positive space (disco ball, foreground) of the Sari Shyrack Inspired Disco Balls
Artist Examples


 Student Examples


 Posts

