Monday, November 17, 2025
UNICORN COLLAGES
Unicorn Collages Learning Targets

I can...
- Create an original Unicorn Collage using drawing techniques learned in class
- Use color combinations (rainbow order, neon colors, metallic colors), line types (loopy, spiral, scallop, wavy), and shape variation (geometric, organic, free form) inspired by The Unicorn Tapestries
- Use collage techniques (assemblage, photomontage, mixed media, decoupage) and design principles (proportion, contrast, repetition) based on Medieval Art
- Define Imagination (the power to form ideas and images in the mind)
Lesson One
Day One, Art Start
1. Tapestry Fragment Depicting A Unicorn (1500) Victoria and Albert Museum

2. Read Never Let A Unicorn Scribble by Diane Alber

3. Discussion Questions "What do you notice about these creatures? Why might an artist choose to combine parts of many different animals? What might these different animals symbolize? Why might someone have wanted to decorate their doorway with creatures like these? Where might we see animals like these today? What kind of creatures would you choose to decorate your own space? Why would you choose these creatures? How big will your unicorn be? What kind of features (water, tree, fences) does the unicorn need? How will you care for the unicorn everyday? Did you know that some people in medieval times thought unicorns were real animals? What is a magical creature? How are magical creatures different from everyday beings? What specials powers do magical creatures have? What kinds of magical creatures are found in different cultures and in stories from around the world? What makes a magical creature special or unusual?"
Lesson Activities
1. Choose 12" X 15" Drawing Paper
2. Use pencil to draw line types (horizontal, vertical, diagonal) for the positive space (foreground, middle ground, unicorn) of the Unicorn Collages
3. Use pencil to draw line types (horizontal, vertical, diagonal) for the negative space (background) of the Unicorn Collages
Day Two, Art Start
1. Retrieve Unicorn Collages for Assigned Tables
2. The Unicorn In Captivity (1495-1505) South Netherlands

3. Discussion Questions "If you could make a tapestry, what would be in it? Would there be animals in your tapestry? Where would the animals be and what would they be doing? What details would you include? Would you hide little animals, like the frog in Unicorn In Captivity? What colors would you use? What does the unicorn in the story have in common with the one you saw in the picture? Why might some things about this unicorn be different? What special powers does the unicorn in the story have? Was the unicorn in the story friendly or unfriendly? Was the unicorn in this story different than unicorns we read or heard about the other day? If you were a unicorn, what powers would you have? Would you rather have a unicorn or a dragon as a friend? If you were a unicorn, what kinds of things would you do? Would you like to be a unicorn? Why or why not?"
Lesson Activities
1. Use color combinations (analogous, rainbow order, secondary) to fill in the positive space (foreground, middle ground, unicorn) of the Unicorn Collages
2. Use color combinations (analogue, rainbow order, secondary) to fill in the negative space (background) of the Unicorn Collages
3. Use oil pastels to add patterns (dots, stripes, swirls, waves) to the positive space (foreground, middle ground, unicorn) of the Unicorn Collages
Day Three, Art Start
1. Retrieve Unicorn Collages for Assigned Tables
2. Set Up Studio Area (oil pastels, watercolor paint, glue sticks, construction paper)
Lesson Activities
1. Use oil pastels to add patterns (dots, stripes, swirls, waves) to the positive space (foreground, middle ground, unicorn) of the Unicorn Collages
2. Use neutral colors (black, white, brown, grey) for the negative space (background) of the Unicorn Collages
3. Add embellishments (jewels, glitters, fabric) to the positive space (foreground, middle ground, unicorn) of the Unicorn Collages
Artist Examples


 Student Examples


Thursday, October 19, 2023
CLAY COAT OF ARMS
Clay Coat Of Arms

Learning Targets
I can...
- Create an original Clay Coat Of Arms using ceramic techniques learned in class
- Use shape variation (geometric, organic, free form), form (two dimensional, three dimensional), and texture (actual, visual, implied) inspired by 16th Century Heraldic Arms
- Use sculpture techniques (casting, carving, assembling, modeling) and design principles (proportion, hierarchy, emphasis) based on Medieval Art
- Define Crest (a decorative design paying tribute, giving meaning, and having significance to the person or family the coat of arms belonging with)
Lesson One
Day One, Art Start
1. Coat Of Arms (1824-1830) The Metropolitan Museum Of Art

2. Read The Complete Book Of Heraldry: An International History Of Heraldry And Its Contemporary Uses by Stephen Slater

3. Discussion Questions "What is Heraldry? What are common characteristics of Heraldry in the Middle Ages? How can I use modern images and symbols to create my own coat of arms? How can color be used symbolically? What are common color meanings in different cultures? How were books made in the Middle Ages? What is illumination? Who were artists who made the books? How can design enhance the meaning of a page of text? How have artists used text and images together in art? How are contemporary altered book artists making new meaning in old books? How can sentences be formed from random words? Can you make the shield to the name of the providence or territory? What are three words people would use to describe your personality? What type of coat of arms would your favorite schools, sports team, or characters in literature have?"
Lesson Activities
1. Add lines for the shield parts (chest, wreath, mantling, helmet, supporters, shield, compartment, motto) within the silhouette of the clay coat of arms
2. Turn Clay slab into basic shapes (shield, wreath, crest) for the positive space (shield) of the clay coat of arms
3. Use modeling tools to draw features (motto, supporters, symbols) for the positive space (shield) of the Clay Coat Of Arms
Day Two, Art Start
1. Retrieve Clay Coat Of Arms for Assigned Tables
2. Original Armorial Design For The Australian Coat Of Arms (1912) National Archives Of Australia

3. Discussion Questions "What do you want your coat of arms to tell? Do any of these Coat Of Arms reveal the person's personality? How have coat of arms developed and evolved as artwork for centuries? What do you know about the symbols and color associations in Coat of Arms? Can you see what the differences are between each of these designs? What is your first reaction to this artwork? Why do you think you had that reaction? If this artwork could dance, what song would it dance to? What do you think this artwork was created for? Why do you say that? How do you think this artwork was made? What is the story being told, if any? How might you feel different about the world after viewing this artwork? What does this artwork say about the culture in which it was produced? How do you think this artwork was used by the people who made it? What was its function? Was this intended to be a work of art or not? Why'd o you think that? How does that impact your understanding of the artwork? What does this artwork teach us about the past?"
Lesson Activities
1. Add shield parts (crest, wreath, mantling, helmet, supporters, shield, compartment, motto) within the positive space (shield) and silhouette of the Clay Coat Of Arms
2. Add details (animals, symbols, motto) to the positive space (shield) and shield parts (crest, wreath, mantling, helmet, supporters, shield, compartment) of the Clay Coat Of Arms
3. Use modeling tools (tools, brush, grips) to smooth out shield parts (crease, wreath, mantling, helmet, supports, shield, compartment, motto) of the Clay Coat Of Arms
Day Three, Art Start
1. Retrieve Clay Coat Of Arms for Assigned Tables
2. Set Up Studio Area (modeling tools, rollers, ceramic mats)
Lesson Activities
1. Add color combinations (analogous, complementary, secondary) to the positive space (shield) of the Clay Coat Of Arms
2. Add color combinations (analogous, complementary, secondary) to the negative space (background) of the Clay Coat Of Arms
3. Apply Gloss Finish to the proportions, features, and accessories of the Clay Coat Of Arms
Artist Examples


 Student Examples


Wednesday, August 23, 2023
OIL PASTEL DRAGON EYES
Oil Pastel Dragon Eyes

Learning Targets
I can...
- Create an original Oil Pastel Dragon Eye using drawing techniques learned in class
- Use analogous colors (red, purple, blue; yellow, orange, green), line types (horizontal, vertical, diagonal), and shape (two dimensional, three dimensional) inspired by Renaissance Artists
- Use value techniques (shades, tints, shadows, highlights) and design principles (composition, proportion, balance) based on Medieval Art
- Define gradation (a small change from one shade, tone, or color to another)
Lesson One
Day One, Art Start


Lesson Activities
1. Choose 12" X 15" Drawing Paper
2. Add line types (horizontal, vertical, diagonal) to the positive space (dragon) of the Oil Pastel Dragon Eyes
3. Outline line types (horizontal, vertical, diagonal) with analogous colors (red blue purple; green yellow orange) for the positive space (dragon) of the Oil Pastel Dragon Eyes
Day Two, Art Start
1. Retrieve Oil Pastel Dragon Eyes for Assigned Tables
2. Articulated Dragon (1880) Myochin School Japan

3. Discussion Questions "What decision did you make on the dragon's appearance and behavior? What kind of dragon are you making? What type of personality does the dragon have? Is your dragon made up of different creatures? What colors have you chosen for your dragon? Do those colors have symbolic meaning? What kind of background color or pattern does your dragon want to perch? What is the name of your dragon? How are dragons a part of the Lunar New Year celebrations? What does the word culture mean to you? What are some different cultures from around the world? What sorts of traditions and symbols are specific to these different cultures? What sorts of traditions and symbols are found in your own culture? Why might it be important to understand cultures other than your own? What is the relationship between art and culture? Are they connected? If so, how?"
Lesson Activities
1. Use analogous colors (red blue purple; green yellow orange) to fill in the positive space (dragon) of the Oil Pastel Dragon Eyes
2. Use analogous colors (red blue purple; green yellow orange) to fill in the negative space (background) of the Oil Pastel Dragon Eyes
3. Use embellishments (plastic eyes, bubble wrap, brown paper) to fill in the positive space (dragon) of the Oil Pastel Dragon Eyes
Day Three, Art Start
1. Retrieve Oil Pastel Dragon Eyes for Assigned Table
2. Set Up Studio Area (oil pastels, erasers, pencils)
Lesson Activities
1. Add highlights (reflective light, light source) to fill in the positive space (dragon) of the Oil Pastel Dragon Eyes
2. Add shadows (cast shadow, reflective shadow) to fill in the negative space (background) of the Oil Pastel Dragon Eyes
3. Add details (eyelashes, spots, whiskers) to the positive space (dragon) of the Oil Pastel Dragon Eyes
Artist Examples


Student Examples


Tuesday, November 30, 2021
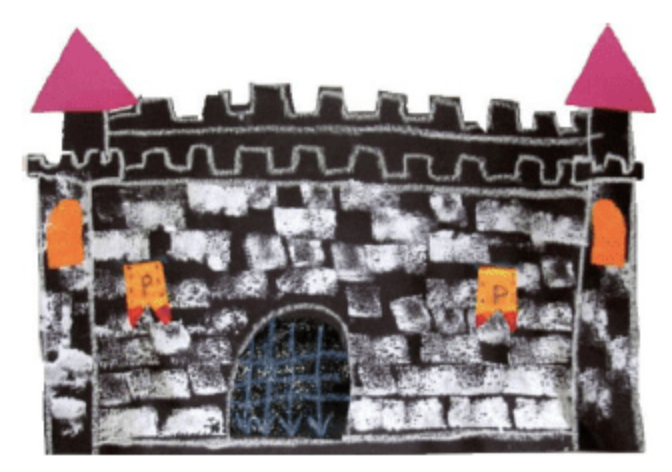
WATERCOLOR CASTLES
Watercolor Castles

Learning Targets
I can...
- Create an original Watercolor Castle using drawing techniques learned in class
- Use shape variation (geometric organic), line variation (horizontal, vertical, diagonal) and space (positive negative) inspired by Impressionist Painter (1840-1926) Claude Monet
- Use different types of patterns (swirls, stripes, floral) and design principles (composition, proportion, gradation) based on Impressionism
- Define Architecture (the practice of designing and constructing buildings)
Lesson One
Day One, Art Start
1. The Portal at Midday (1893) Claude Monet

2. Read Castles by Gillian Osband

3. Discussion Questions "How did the artist use geometric shapes to draw their castle? Did the artist create at least one pattern on their case? Did the artist use watercolor effectively? Did the artist draw a castle that takes up most of the space on the paper? Did the artist add horizon lines to give the artwork depth? How do these castles connect to fairytale stories or architecture? What were the group of knights that protected the castle called? What are the main features of a castle? How were castles built?"
Lesson Activities
1. Retrieve 12" X 15" Drawing Paper
2. Draw a horizon line in the negative space (background) of the white paper for the Watercolor Castles
3. Use geometric shapes (rectangle, squares, triangles) to add buildings parts (towers, walls, doors) to the positive space (building) of the Watercolor Castles
Day Two, Art Start
1. Retrieve Watercolor Castles for Assigned Table
2. Rouen Cathedral, Study of the Portal (1892) Claude Monet

3. Discussion Questions "Have you ever made a castle? What types of tools did you use? What would make the best castle- height, sturdiness, or level of detail? What are some materials (rocks, sticks, moats) that can be used to protect castles from the waves? What is the different between a palace and a castle? How would you build a castle in a whole day? Why were castles built in medieval times? What were the first castles made out of? What was the castle keep and what was its purpose? What was the title of the person in charge of the affairs within the castle?"
Lesson Activities
1. Use line variation (vertical, horizontal, diagonal) to add texture (bricks, stone, metal) to the positive space (castle) of the Watercolor Castles
2. Add architectural features (flag, moat, draw bridge) to the medieval castles of the Watercolor Castles
3. Use eraser to remove any guidelines from the positive space (building) of the Watercolor Castles
Day Three, Art Start
1. Retrieve Watercolor Castles for Assigned Table
2. Set Up Studio Area (colored pencil, sharpeners, erasers)
Lesson Activities
1. Use earth tones (brown red black) to fill in the positive space (building) of the castle drawings
2. Use earth tones (green blue white) to fill in the negative space (background) of the castle drawings
3. Add highlights (reflective light, light source) and shadows (cast shadow, shadow) to the positive space (building) of the Watercolor Castles
Artist Examples


 Student Examples



Wednesday, August 4, 2021
CLAY GARGOYLE
Clay Gargoyle

Learning Targets
I can...
- Create an original Clay Gargoyle using sculpture techniques learned in class
- Use form (two dimensional, three dimensional), shape (geometric, organic), and texture (rough smooth) inspired by American Artist (1963-Present) Sam Sidders
- Use ceramic techniques (slip and score, coil method, hand building) and design principles (proportion, balance, movement) based on Medieval Architecture
- Define Caricature (a picture, description, or imitation of a person in which characteristics are exaggerated for a comic effect)
Lesson One
Day One, Art Start
1. Ulmer Munster Gargoyle (2012) Sam Sidders

2. Read Anthony and the Gargoyle by Jo Ellen Bogart

3. Discussion Questions "How can improvisation and spontaneous exploration of metals positively influence the creation of artwork? What are gargoyles? What are grotesques? What happened to the story gargoyles over time? Why do buildings have gargoyles? What is a chimera? Have you ever felt like someone was watching you? Do you think you could ever create a gargoyle? If you could design your own gargoyle, what would it look like?"
Lesson Activities
1. Add lines for proportion (head, body, tail) within the silhouette of the gargoyle sculptures
2. Mold clay into basic shapes (cylinder, cone, pyramid) for the positive space (body) of the gargoyle sculptures
3. Use modeling tools to draw facial features (eyelashes, eyelids, freckles) within the silhouette of the Clay Gargoyles
Day Two, Art Start
1. Retrieve Clay Gargoyles for Assigned Table
2. The Same Old Thing (2012) Sam Sidders

3. Discussion Questions "Do you think you could ever sculpt a gargoyle out of stone? What if you could grow your own gargoyle? Did you know The Monster walks is a series of virtual tours of gargoyles that can be found in and around New York? Do you know what these statues are? Do you notice any differences between modern gargoyles and the ones created over 700 years ago? What did you observe about the old gargoyles? How are the old gargoyles and the new gargoyles different? How can you explain why happened to the old gargoyles? What made them change? Where did the stone go?"
Lesson Activities
1. Add facial features (eyelashes, eyelids, freckles) within the silhouette of the Clay Gargoyles
2. Add details (wings, claws, teeth) to the positive space (body) of the gargoyle sculptures
3. Use modeling tools (brush grip paddle) to smooth out the facial features (eyelashes eyelids freckles) of the Clay Gargoyles
Day Three, Art Start
1. Retrieve Clay Gargoyles for Assigned Table
2. Set Up Studio Area (rubber mat, modeling tools, clay)
Lesson Activities
1. Add tempera paint (red yellow orange) to the positive space (body) of the gargoyle sculptures
2. Add tempera paint (blue green purple) to the negative space (background) of the gargoyle sculptures
3. Apply Gloss Finish to the facial proportions, facial features, and accessories of the Clay Gargoyles
Artist Examples


 Student Examples


 Posts

