Thursday, August 20, 2026
ART MUSEUM SCULPTURES
Art Museum Sculptures Learning Targets

I can...
- Create an original Art Museum Sculpture using drawing techniques learned in class
- Use shape variation (geometric, organic, free form), form (two dimensional, three dimensional), and texture (actual visual implied) inspired by Chinese American Architect (1917-2019) I.M. Pei
- Use sculpture techniques (carving, casting, assembling, modeling) and design principles (proportion, movement, composition) based on Modern Architecture
- Define Museum (a public or private non-profit institution that collects, preserves, studies, and exhibits works of visual art for entertainment)
Lesson One
Day One, Art Start
1. Louvre Pyramid (1983-1984) I.M.Pei

2. Read The Glass Pyramid: A Story Of The Louvre Museum And Architect I.M.Pei by Jeannie Walker Harvey

3. Discussion Questions "What do museums want people to learn and why? Who are museums hoping to attract and why? Are there any culturally significant objects you would include in your museum? Is there an item passed down from your family or an item from your home country you could include? How can you document the important information about each item? Did you know most museums record the date it was collected, where the artwork came from, and a brief description of the object? How does visiting museums help motivate us to learn more about art history? What are the colors, shapes, and objects you can see without giving any facts? Why is touching artwork forbidden and how do guards protect the work for the future? How can buildings reflect the relationship between people and the environment?"
Lesson Activities
1. Choose Three 12 X 12 Cardboard Sheets
2. Use three compositional elements (shape, color, texture) to represent a memory, place, or event from ones own heritage
3. Use line variation (wavy, straight, curved) as a design principle (balance, movement, repetition) with the Art Museum Sculptures
Day Two, Art Start
1. Retrieve Art Museum Sculptures For Assigned Tables
2. Rock And Roll Hall Of Fame (1995) I.M. Pei

3. Discussion Questions "What do you notice about this art museum building? How would you describe it to someone who has never seen it? What do you see that makes you say that? What details might have been inspired by nature or ancient civilizations? What might this museum suggest about the relationship between local people and their environment? What evidence supports your ideas? What might this suggest about your communities outlook on the natural world? How does each work of art reflect the natural world? How does your building look from different sides? How do visitors walk through this museum? What is the mood of your museum, and how will your building shape reflect that? Will your building be historical and classical, or sleek and modern? How will people enter your museum? What makes your building look like a museum rather than an office building, home, or school?"
Lesson Activities
1. Use compass, protractors, and texture plates to add symmetrical shapes (circle, triangles, squares) to the Art Museum Sculptures
2. Use form (two dimensional, three dimensional) to fill in the positive space (foreground, middle ground) of the Art Museum Sculptures
3. Use form (two dimensional, three dimensional) to fill in the negative space (background) of the Art Museum Sculptures
Day Three, Art Start
1. Retrieve Art Museum Sculptures for Assigned Tables
2. Set Up Studio Area (washable markers, glue sticks, scissors, colored pencils)
Lesson Activities
1. Use scissors to cut out two dimensional symmetrical shapes (circles, triangles, squares) to create a three dimensional Art Museum Sculptures
2. Glue Down three dimensional symmetrical shapes (circles, triangles, squares) to create a three dimensional Art Museum Sculptures
3. Add decorations (old art, newspaper, fabric scraps, colored paper, buttons, collage) to positive space (foreground, middle ground) of the Art Museum Sculptures
Artist Examples


 Student Examples


Thursday, January 29, 2026
CLAY ICE CREAM CONES
Clay Ice Cream Cones Learning Targets

I can...
- Create an original Clay Ice Cream Cone using ceramic techniques learned in class
- Use form (two dimensional, three dimensional), shape variation (geometric, organic, free form), and texture (actual visual implied) inspired by American Sculptor (1929-2022) Claes Oldenburg
- Use basic hand building techniques (rolling, flattening, joining, cutting) and design principles (balance, proportion, emphasis) based on Pop Art
- Define Texture (the feel or appearance of a surface)
Lesson One
Day One, Art Start
1. Floor Cone (1962) Claes Oldenburg

2. Read Ice Cream Cones For Sale by Elaine Greenstein

3. Discussion Questions "What do you think is your best clay tool? Do you think that if I were to drop this clay piece, it would stay together? Can you create a three-dimensional ice cream cone out of clay using the techniques of scoring, slipping, cutting, and smoothing? Can you use specific colors to paint your ice cream cone realistic or abstract? Can you add at least two unique details to your ice cream cone by using texture or shapes? Can you participate in a discussion of how artists use clay? What flavor is your faoviret type of ice cream? Who likes chocolate ice cream, vanilla ice cream, mint ice cream, and rocky road ice cream?"
Lesson Activities
1. Add line types (horizontal, vertical, diagonal) for the proportions (foreground, cone, ice cream scoops) within the silhouette of the Clay Ice Cream Cones
2. Mold clay into basic shapes (oval scoops, triangle cones, cherry circles) for the positive space (foreground, cone, ice cream scoops) of the Clay Ice Cream Cones
3. Use needle tools to draw basic shapes (triangles, squares, rectangles) for the positive space (foreground, cone, ice cream scoops) of the Clay Ice Cream Cones
Day Two, Art Start
1. Retrieve Clay Ice Cream Cones for Assigned Tables
2. Dropped Cone (2001) Claes Oldenburg


3. Discussion Questions "What shapes do you see in this ice cream cone sculpture? If you could touch this, what do you think it would feel like? Is the ice cream cone rough, smooth, hard, or soft? How does the size of the ice cream cone compare to the real one? What would an artist make an ice cream cone as big as a room or a building? If this giant ice cream cone was in your school, where would you put it? If you look at the "Dropped Cone" sculpture, what do you think happened to it? What makes this sculpture look like a "Pop Art" piece? If you made your own giant food sculpture out of clay, what food would you choose? How could you use texture to make the ice cream cone look "drippy" or "melting" in your own artwork? Why do you think the artist chose to make art of out of something we eat quickly?"
Lesson Activities
1. Add basic shapes (triangles, ovals, circles, rectangles) to the negative space (background, middle ground) of the Clay Ice Cream Cones
2. Add details (cherries, sprinkles, caramel, dipped chocolate) to the positive space (foreground, cone, ice cream scoops) of the Clay Ice Cream Cones
3. Use modeling tools (paddle, brush, grips) to smooth out the positive space (foreground, cone, ice cream scoops) of the Clay Ice Cream Cones
Day Three, Art Start
1. Retrieve Clay Ice Cream Cones for Assigned Tables
2. Set Up Studio Area (modeling tools, rubber mats, clay, glaze)
Lesson Activities
1. Add warm colors (red, orange yellow) to the positive space (foreground, ice cream cone) of the Clay Ice Cream Cones
2. Add cool colors (blue, purple, green) to the negative space (middle ground, background, ice cream scoops) of the Clay Ice Cream Cones
3. Apply Gloss Finish to the positive space (foreground, ice cream cone, ice cream scoops) of the Clay Ice Cream Cones
Artist Examples


 Student Examples


Thursday, December 19, 2024
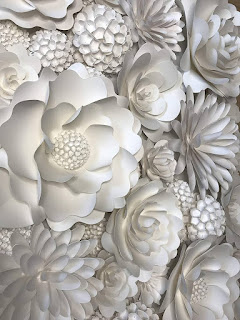
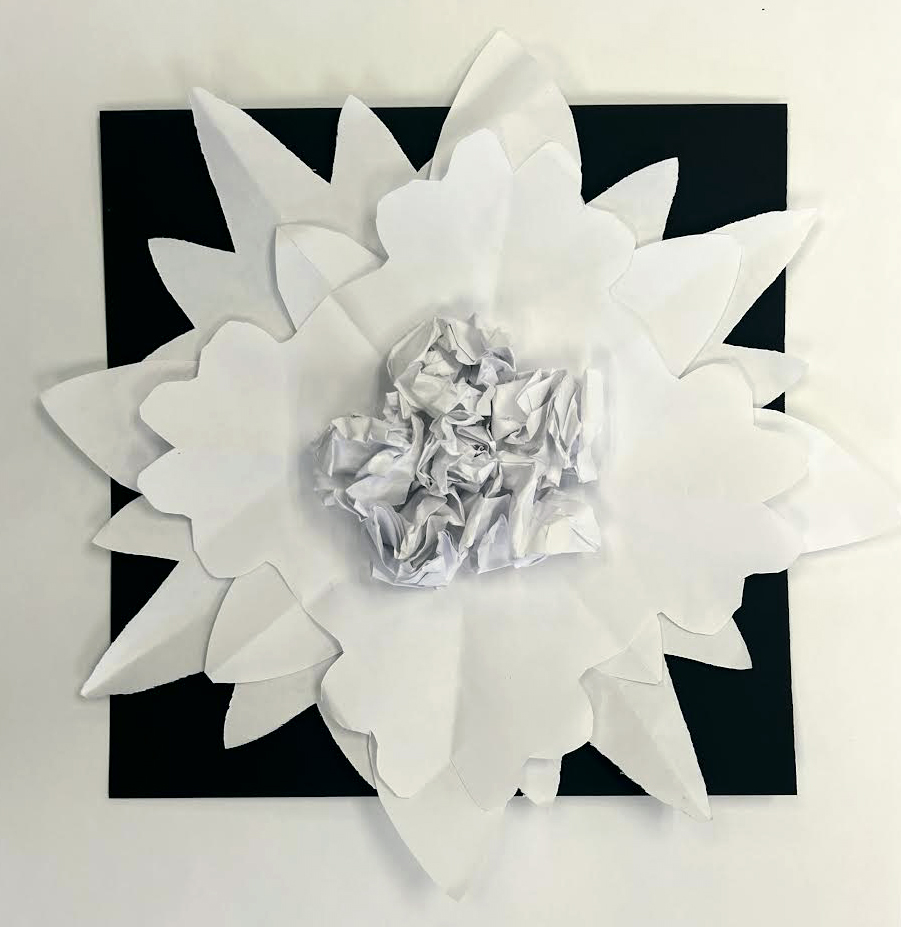
PAPER FLOWER SCULPTURES
Paper Flower Sculptures

Learning Targets
I can...
- Create an original Paper Flower Sculptures using sculpture techniques learned in class
- Use shape variation (geometric organic free form), form (two dimensional, three dimensional), and texture (actual visual implied) inspired by American Sculptor (1998-Present) Kirsten Hassenfeld
- Use paper techniques (folding tearing bending curling) and design principles (proportion composition movement) based on American Art
- Define Curvesto (to create shadows within the sculpture)
Lesson One
Day One, Art Start
1. In The Moon (2007) Kirsten Hassenfeld

2. Read Have You Ever Seen A Flower by Shawn Harris

3. Discussion Questions "How do artists use paper, a two-dimensional object, to create a three-dimensional sculpture using a series of techniques? What do you think are important features of a flower and what shapes do these features take in your mind? Why are flowers such as Van Gogh's Sunflowers to Georgie O'Keefe series a favorited subject among painters? How does the artistic process parallel the development of a flower? How do visual methods help you better understand the functions of each plant part? After learning these visual art terms such as symmetry and balance, how do they contribute to the structure of a flower? How do you see the flowers functioning in a positive manner on these parade floats? What was the key thing you needed to keep in mind when creating your own sculpture? What did you find challenging about your artwork?"
Lesson Activities
1. Choose 12 X 12 Colored Construction Paper
2. Use three compositional elements (shape color texture) to select a flower to represent a memory, place, or event for flower sculptures
3. Use line variation (wavy, straight, curved) as a design principles (balance, movement, repetition) within the flower sculptures
Day Two, Art Start
1. Retrieve Paper Flower Sculptures for Assigned Tables
2. Blue Horn (2010) Kirsten Hassenfeld

3. Discussion Questions "Who is the artist of each sculpture? What do you know about him or her? what is the subject matter? When was this sculpture completed for and for whom (if known)? What medium was it done with? Why was it made, is it known? For what purpose or use does the sculpture have? How are these sculptures similar or different? What feeling do each of these sculptures reveal about the artist and style? What does these sculptures reveal about the artist? What does this piece reveal about the society in which they were created? What does this sculpture represent? What do you hink is happening in this sculpture? What action do you see and how does it contribute to the feeling of this piece? How is the artist telling us a story?"
Lesson Activities
1. Use compasses, protractors, and texture plates to add symmetrical shapes (circle, triangle, square) and expressive lines (straight, curved, swirling) to the paper flower sculptures
2. Use neutral colors (black, white, grey) to fill in the negative space (background) of the paper flower sculptures
3. Use neutral colors (black, white, grey) to fill in the positive space (foreground) of the Paper Flower Sculptures
Day Three, Art Start
1. Retrieve Paper Flower Sculptures for Assigned Tables
2. Set Up Studio Area (construction paper, clear tape, pencils, tempera paint)
Lesson Activities
1. Use scissors to cut out two dimensional symmetrical shapes (circle, triangle, rectangle) to create a three dimensional shape paper flower sculptures
2. Glue down three dimensional symmetrical shapes (cylinder, sphere, cone, pyramid) to create a three dimensional shape paper flower sculptures
3. Use sharpie markers to add beautiful patterns (hearts, stripes, swirls) within the positive space (flower) of the Paper Flower Sculptures
Artist Examples

 Student Examples



Wednesday, December 18, 2024
CARDBOARD STEAMPUNK MACHINES
Cardboard Steampunk Machines
 Learning Targets

I can...
- Create an original Cardboard Steampunk Machines using drawing techniques learned in class
- Use color combinations (metallic, earth tones, neutral colors), form (two dimensional, three dimensional) and texture (actual visual implied) inspired by Russian Sculptor (1987-Present) Igor Verny
- Use sculpture techniques (slots, tabs, folds, brackets) and design principles (balance, proportion, movement) based on Steampunk
- Define Kitbashing (art of making a sculpture by taking bits out of broken plastic toys, found objects, or recycled materials)
Lesson One
Day One, Art Start
1. Little Bird (2020) Igor Verny

2. Read How The Steam Locomotive And Steam Technology Work by Robert Lamb

3. Discussion Questions "How has the Victorian Era affected art, literature, culture, fashion, and technology? What is the difference between form and function? How has the Gilded Age brought forth change? Which one: form or function does Steampunk identify with the most? What is the most significant imagery in Steampunk? How is Steampunk portrayed? How does the Victorian Era set the stage for fashion and how is fashion design a form of art? How does the Steampunk art movement relate to us now and how will it relate to generations from now? How do authors, illustrators, filmmakers, and artists integrate technology and science fiction with art to create Steampunk? Who and what has influenced the art movement? How has Steampunk influenced other pursuits and studies?"
Lesson Activities
1. Choose Three 12 X 12 Cardboard Sheets
2. Use three compositional elements (shape color texture) to represent a memory, place, or event from ones own history
3. Use line variation (wavy, straight, curved) as a design principle (balance, proportion, composition) within ones own Cardboard Steampunk Machines
Day Two, Art Start
1. Retrieve Cardboard Steampunk Machines for Assigned Tables
2. Wasp (2018) Igor Verny

3. Discussion Questions "How has the use of steam made life easier for people throughout history? Can your sculptural piece embody the spirit of Steampunk? Did you know writings about imaginary spaceships can be traced to over 300 years ago? What structures today are similar to being in the air? What role does imagination play in science and vice versa? What fashion trends have influenced and contributed to steampunk fashion? How do thinkers and makers take inspiration from science fiction stories? How do artists have an impact on modern culture and future inventions?"
Lesson Activities
1. Use compass, protractor, and texture plates to add symmetrical shapes (circle, square, triangle) and expressive lines (thick, thin, straight, curved) to the cardboard machines
2. Use form (two dimensional, three dimensional) to fill in the positive space (animal, object, creature) of the cardboard machines
3. Add decorations (old newspaper, goggles, gears, bolts, screws) to the positive space (foreground) of the Cardboard Steampunk Machines
Day Three, Art Start
1. Retrieve Cardboard Steampunk Machines for Assigned Tables
2. Set Up Studio Area (glue bottles, cardboard, push pins, metallic paint)
Lesson Activities
1. Use scissors to cut out two dimensional shapes (circle, square, triangle) to create three dimensional shapes (cylinder, cone, pyramid) for the steampunk machines
2. Glue down three dimensional symmetrical shapes (cylinder, cone, pyramid) to create a three dimensional structure (cylinder, cone, pyramid) for the steampunk machines
3. Add decorations (old art, newspaper, colored paper) to the positive space (foreground) of the Cardboard Steampunk Machines
Artist Examples


 Student Examples


 Posts

