Sunday, August 15, 2021
MURAKAMI FLOWERS
Murakami Flowers

Learning Targets
I can...
- Create an original Murakami Flower using drawing techniques learned in class
- Use shape variation (geometric, organic), line types (horizontal, vertical, diagonal) and space (positive negative) inspired by Contemporary Artist (1962-Present) Takashi Murakami
- Use form (two dimensional, three dimensional) and design principles (repetition, variation, contrast) based on Contemporary Art
- Define Super Flat (a woodcut aesthetic combining fine art and pop culture of Japan)
Lesson One
Day One, Art Start
1. Flowers of Hope (2018) Takashi Murakami

2. Read Planting A Rainbow by Lois Ehlert
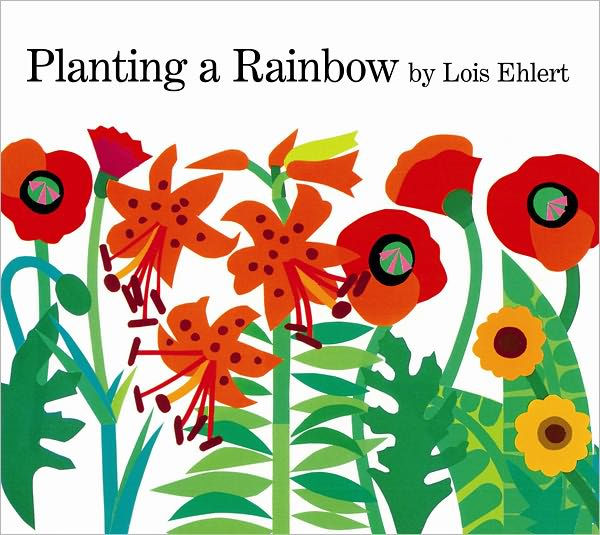
3. Discussion Questions "What is different about these flowers? How many different colors can you find of this flower? Are some of the flowers more colorful than others? How would you describe the shape of the petals? Are the petals of each flower the same? How many petals does this flower have? How would you describe the center of this flower? Where did you find each flower? How would you describe it? How would you describe the stem? How would you describe the petals? Is this flower part of something else or is it growing by itself? Are there more flowers like this one nearby? What kind of flower do you think this is?"
Lesson Activities
1. Choose 12" X 15" Drawing Paper
2. Use line types (horizontal vertical diagonal) to draw positive space (flower) of flower drawings
3. Use analogous colors (red orange yellow) to fill in the positive space (flower) of the Murakami Flowers
Day Two, Art Start
1. Retrieve Murakami Flowers for Assigned Table
2. A Flower Forest (2021) Takashi Murakami

3. Discussion Questions "What type of flower would you be? How many flowers can you identify? Do you know the names of all these flowers? How many different colors can you find on this flower? Are some of the flowers more colorful than others? How would you describe the same of the petals? Are the petals of each flower the same shape? How many petals does this flower have? How would you describe the center of this flower? Where do you find each flower? How would you describe it? How would you describe its stem, petals, or leaves? Is the flower part of something else or is it growing by itself? Are there more flowers like this one nearby? If you gently touch this flower, how does it feel? Are parts of it smooth or rough? What kind of flower do you think this is? How are the flowers the same? How are the flowers different?"
Lesson Activities
1. Add shape variation (geometric organic free form) to negative shape (background) of the flower drawings
2. Use patterns (swirls, zig zag, stripes) to add a design to the negative space (background) of the flower drawings
3. Use chalk to blend patterns (swirls, zig zag, stripes) for the negative space (background) of the Murakami Flowers
Day Three, Art Start
1. Retrieve Murakami Flowers for Assigned Table
2. Set Up Studio Area (chalk pastels, erasers, colored pencil)
Lesson Activities
1. Blend analogous colors (orange yellow red) for the positive space (flower) of the flower drawings
2. Add highlights (light source reflective light) to the positive space (flower) of the flower drawings
3. Add illusion of depth by adding details (petals glitter smile) to the positive space (flower) of the Murakami Flowers
Artist Examples


 Student Examples


Monday, April 6, 2020
FLYING FISH PRINTS
Flying Fish Prints

Learning Targets
- Create an original Flying Fish Print using drawing techniques learned in class
- Use warm/cool colors (red orange yellow; green blue purple), shape variation (geometric, organic), and texture (visual, actual, implied) inspired by Contemporary Artist (1951-Present) Wolfgang Tambour
- Use printmaking techniques (woodcut, etching, engraving) and design principles (balance, movement, proportion) based on Contemporary Art
- Define Relief (impression that sculpted material has been raised above the background plane)
Lesson One
Day One, Art Start
1. Rainbow Trout (2020) Wolfgang Tambour

Lesson Activities
1. Use pencil to draw shape variation (organic, geometric, biomorphic) of the selected fish (goldfish, trout, carp, salmon) for fish prints2. Use line types (horizontal, vertical, diagonal) to add characteristics (gills, eyes, fins) for fish prints
3. Use texture tools (stamps, felt pens, folks) to add patterns (dots, stripes, swirls) for fish prints
Day Two, Art Start
1. Retrieve Flying Fish Prints for Assigned Table2. Brown Trout (2020) Wolfgang Tambour

Lesson Activities
1. Use warm colors (red orange yellow) to fill in positive space (fish) of the flying fish prints2. Use cool colors (blue purple green) to fill in negative space (background) of the flying fish prints
3. Add line types (horizontal, vertical, diagonal) to negative space (background) of the flying fish prints
Day Three, Art Start
1. Retrieve Flying Fish Prints for Assigned Table2. Set Up Studio Area (texture tools, relief pieces, glue sticks)
Lesson Activities
1. Add highlights (reflective light, light source) to positive space (fish) of the flying fish prints2. Add shadows (cast shadow, shadow) to negative space (background) of the flying fish prints
3. Add relief pieces (styrofoam pieces, cardboard, poster board) behind the fish and rocks of the flying fish prints
Artist Examples


 Student Examples


 Posts

