Monday, November 17, 2025
UNICORN COLLAGES
Unicorn Collages Learning Targets

I can...
- Create an original Unicorn Collage using drawing techniques learned in class
- Use color combinations (rainbow order, neon colors, metallic colors), line types (loopy, spiral, scallop, wavy), and shape variation (geometric, organic, free form) inspired by The Unicorn Tapestries
- Use collage techniques (assemblage, photomontage, mixed media, decoupage) and design principles (proportion, contrast, repetition) based on Medieval Art
- Define Imagination (the power to form ideas and images in the mind)
Lesson One
Day One, Art Start
1. Tapestry Fragment Depicting A Unicorn (1500) Victoria and Albert Museum

2. Read Never Let A Unicorn Scribble by Diane Alber

3. Discussion Questions "What do you notice about these creatures? Why might an artist choose to combine parts of many different animals? What might these different animals symbolize? Why might someone have wanted to decorate their doorway with creatures like these? Where might we see animals like these today? What kind of creatures would you choose to decorate your own space? Why would you choose these creatures? How big will your unicorn be? What kind of features (water, tree, fences) does the unicorn need? How will you care for the unicorn everyday? Did you know that some people in medieval times thought unicorns were real animals? What is a magical creature? How are magical creatures different from everyday beings? What specials powers do magical creatures have? What kinds of magical creatures are found in different cultures and in stories from around the world? What makes a magical creature special or unusual?"
Lesson Activities
1. Choose 12" X 15" Drawing Paper
2. Use pencil to draw line types (horizontal, vertical, diagonal) for the positive space (foreground, middle ground, unicorn) of the Unicorn Collages
3. Use pencil to draw line types (horizontal, vertical, diagonal) for the negative space (background) of the Unicorn Collages
Day Two, Art Start
1. Retrieve Unicorn Collages for Assigned Tables
2. The Unicorn In Captivity (1495-1505) South Netherlands

3. Discussion Questions "If you could make a tapestry, what would be in it? Would there be animals in your tapestry? Where would the animals be and what would they be doing? What details would you include? Would you hide little animals, like the frog in Unicorn In Captivity? What colors would you use? What does the unicorn in the story have in common with the one you saw in the picture? Why might some things about this unicorn be different? What special powers does the unicorn in the story have? Was the unicorn in the story friendly or unfriendly? Was the unicorn in this story different than unicorns we read or heard about the other day? If you were a unicorn, what powers would you have? Would you rather have a unicorn or a dragon as a friend? If you were a unicorn, what kinds of things would you do? Would you like to be a unicorn? Why or why not?"
Lesson Activities
1. Use color combinations (analogous, rainbow order, secondary) to fill in the positive space (foreground, middle ground, unicorn) of the Unicorn Collages
2. Use color combinations (analogue, rainbow order, secondary) to fill in the negative space (background) of the Unicorn Collages
3. Use oil pastels to add patterns (dots, stripes, swirls, waves) to the positive space (foreground, middle ground, unicorn) of the Unicorn Collages
Day Three, Art Start
1. Retrieve Unicorn Collages for Assigned Tables
2. Set Up Studio Area (oil pastels, watercolor paint, glue sticks, construction paper)
Lesson Activities
1. Use oil pastels to add patterns (dots, stripes, swirls, waves) to the positive space (foreground, middle ground, unicorn) of the Unicorn Collages
2. Use neutral colors (black, white, brown, grey) for the negative space (background) of the Unicorn Collages
3. Add embellishments (jewels, glitters, fabric) to the positive space (foreground, middle ground, unicorn) of the Unicorn Collages
Artist Examples


 Student Examples


Wednesday, August 20, 2025
PUMPKINS ON PLAID BLANKETS
Pumpkins On Plaid Blankets

Learning Targets
I can...
- Create an original Pumpkins On Plaid Blankets using collage techniques learned in class
- Use line types (horizontal, vertical, diagonal), shape variation (geometric, organic, free form), and value (lightness, darkness, tone) inspired by Contemporary Artist (1929-Present) Yayoi Kusama
- Use shading techniques (tone, darkness, lightness, depth) and design principles (composition, repetition, balance) based on Contemporary Art
- Define Pipette Painting (an art technique where liquid paint is applied to a surface using a dropper instead of traditional brush)
Lesson One
Day One, Art Start
1. Pumpkin (2018) Yayoi Kusama

2. Read The Runaway Pumpkin by Kevin Lewis

3. Discussion Questions "Does this pumpkin symbolize abundance, harvest to transformation, or playfulness? How was the pumpkin significant in different art movements? How does this painting, with its quiet simplicity, offer insight into how art can serve as a form of resilience or refuge during dark times? What does it suggest about how art reflects emotional and historical realities? How can we apply this idea to other areas of life or creative expression? In what ways can simplicity and calmness be forms of resistance to suffering? How might this reflect the artists view of the world? Can you think of other ways artists (writers, filmmakers) use everyday objects to explore bigger ideas like time, mortality, or beauty? How does knowing about the artists personal life change the way you view these pumpkins?"
Lesson Activities
1. Use geometric shapes (oval, circle, rectangle) to draw an assorted vegetable (pumpkin, onion, squash) for the pumpkin collages
2. Use geometric shapes (oval circle rectangle) to draw details (stems, leaves, table) for the pumpkin collages
3. Use line types (horizontal, vertical, diagonal) to draw the positive space (pumpkin) and details (stem, leaves, table) of the Pumpkins On Plaid Blankets
Day Two, Art Start
1. Retrieve Pumpkins On Plaid Blankets for Assigned Tables
2. Red Colored Pumpkin (1994) Yayoi Kusama

3. Discussion Questions "If you had to paint something from your own background or daily life, what would you choose? How does art help us celebrate ordinary things? What emotions or ideas do you think this artist is trying to express with these choices? How does this painting challenge traditional still-life paintings you have seen before? What makes it feel more modern or different? What objects from nature would you choose to paint or draw to show themes of growth or life? How do you think color alone can make us think of objects or seasons, even if they are not there? How does the artist use lines and colors to represent a well-known object? How does the use of subtle colors change the mood of the painting? Why do you think artists' styles change over time? Can you think of an example of an artist, musician, or write whose style has changed as they have gotten older or experienced new things?"
Lesson Activities
1. Use line types (horizontal, vertical, diagonal) to add details (stems, leaves, vines) to the positive space (pumpkins, foreground) of the pumpkin collages
2. Use oil pastels to fill in the positive space (pumpkins, foreground) with neutral colors (black, grey, white) for the pumpkin collages
3. Use oil pastels to fill in the negative space (background, blanket) with neutral colors (black, grey, white) for the Pumpkins On Plaid Blankets
Day Three, Art Start
1. Retrieve Pumpkins On Plaid Blankets for Assigned Tables
2. Set Up Studio Area (tempera paint, paint brushes, water buckets)
Lesson Activities
1. Add pumpkin parts (brown stem, green leaves, vines) with neutral colors (black, white, grey) for pumpkin collages
2. Use texture techniques (eraser, cloth, sponge) to add details (stems, green leaves, vines) for the pumpkin collages
3. Add highlights (reflective light, light source) and shadows (cast shadow, shadow) to the negative space (background) of the Pumpkins On Plaid Blankets
Artist Examples


 Student Examples


Wednesday, November 13, 2024
SUGAR COOKIE ASSORTMENTS
Sugar Cookie Assortments

Learning Targets
I can...
- Create an original Sugar Cookie Assortments using drawing techniques learned in class
- Use line types (contour, continuous, outline), color combinations (earth tones, warm colors, secondary), and texture (actual, implied, visual) inspired by American Author (2017-Present) M.E. Furman
- Use art element: shape (geometric, organic, free form) and design principles (composition, variation, geometric) based on American Illustrations
- Define Cookie Cutter (a device with sharp edges for cutting cookie dough in a particular shape)
Lesson One
Day One, Art Start
1. Nutcracker Portrait Cookie (2023) Lucie Radcliffe Steele

2. Read A World Of Cookies For Santa: Follow Santa's Tasty Trip Around The World by M.E. Furman

3. Discussion Questions "Do you think it is important to do something like following a recipe in order? Why or why not? If you do not follow directions in order, what could happen? What is the first step? How do you get from step one to the last step? What will happen when we put cookies in the oven? Why do you think we put butter in our cookies? How do different ingredients alter different types of cookies? Why does the world need creative problem solvers, innovators, and thinkers? Do you remember what the word pattern means? Who stole the cookie from the cookie jar? What taste, flavor, texture, aroma, and appearance do you notice from this cookie? What specific techniques or craftsmanship did you gain from this lesson? How do you promote originality in your own artwork? What do you think about cookie-cutter projects?"
Lesson Activities
1. Choose 12" X 12" Drawing Paper
2. Draw three thumbnail sketches of cookies (icebox, peanut butter, drop, biscotti, bar, shortbread) using observational drawing skills (outline, contour, continuous) for cookie drawings
3. Add details (shadows, reflective light) to negative space (background) of the Sugar Cookie Assortments
Day Two, Art Start
1. Retrieve Sugar Cookie Assortments for Assigned Tables
2. Mouse King Cookie (2023) Lucie Radcliffe Steele

3. Discussion Questions "What is your favorite type of cookie? Do you like cookies with hard, crunchy, soft, or chewy textures? What is the meaning of the term bake? How is baking different from cooking? What characteristics of a cookie make it unhealthy? Is the cookie monster setting a bad example? Why or why not? Why did we do this? Why is this a significant problem? How could you improve the process? What aspect of baking cookies might you be most excited about? What would you have to do to double the number of cookies the recipe makes? Why would a cook for baker need to know how to adjust recipes? How do you think these skills will help in our art project? What is the most interesting fact your learned during this art project?"
Lesson Activities
1. Use drawing techniques (contour, outline, continuous) to add basic shapes (circle, triangle, rectangle) of the cookie drawings
2. Use design principles (composition, repetition, gradation) to fill in the positive space (foreground, cookie) of the cookie drawings
2. Use drawing techniques (contour, outline, continuous) to add details (shadows, reflective light) to the Sugar Cookie Assortments
Day Three, Art Start
1. Retrieve Sugar Cookie Assortments for Assigned Tables
2. Set Up Studio Area (puff paint, glue sticks, scissors, construction paper, tempera paint)
Lesson Activities
1. Use color combinations (earth tones, warm colors, secondary) to fill in the positive space (foreground, cookies) of the cookie drawings
2. Use color combinations (earth tones, warm colors, secondary) to fill in the negative space (background) of the cookie drawings
3. Add design details (shadows, reflective light, light source) to the negative space (background) of the Sugar Cookie Assortments
Artist Examples


 Student Examples




Wednesday, October 2, 2024
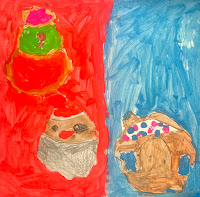
MONSTER IN CLOSET COLLAGES
Monster In Closet Collages Learning Targets

I can...
- Create an original Monster In Closet Collages using drawing techniques learned in class
- Use shape variation (geometric, organic, free form), complementary colors (red, green; blue, orange; yellow, purple), and texture (actual, implied, visual) inspired by Oregon Art Teacher/Artist (1994-Present) James DeRosso
- Use collage techniques (overlapping, layering, cropping) and design principles (variation, composition, balance) based on American Art
- Define Texture (the visual and tactical surface characteristics that add to a work of art)
Lesson One
Day One, Art Start
1. Mad Max (2017) James DeRosso

2. Read There Is A Nightmare In My Closet by Mercer Mayer

3. Discussion Questions "How many of you have thought you had a monster under your bed or in your closet? What did that monster look like or feel like? What would you do if you heard something in the closet? What shapes do you see in these monsters? What does the outside of your closet door look like? How does the monster look? Does the monster look silly because he is fuzzy? Is the monster scary because he has horns or sharp teeth? What is the name of your monster? How does the monster feel? What does the monster look like or have? What is the monster feeling? How do you know from the illustrations? Can artists or people think different colors go with different feelings? If you were a color right now, what color would you be? How are monsters born from our imagination?"
Lesson Activities
1. Choose 12" X 15" Drawing Paper
2. Use pencil to add line types (horizontal, vertical, diagonal) to the positive space (monster) of the monster collages
3. Use pencil to add facial features (eyes, nose, mouth) to the positive space (monster) of the Monster In Closet Collages
Day Two, Art Start
1. Retrieve Monster In Closet Collages for Assigned Tables
2. Pet Monster (2017) James DeRosso

3. Discussion Questions "Will your monster by mean, nice, silly, scary or happy? How do you make a scary mouth? What do the eyes on your monster look like? What type of patter will you add onto the monster? Are monsters real? Where do monster live? Will you ever meet a monster in real life? What role do monsters play in various cultures? How are they reflected in various art forms? How have monsters been viewed? What purpose do monsters serve? Why are monsters necessary in real life? How does the monster look? What are some of the things you might do if you were in the same situation? Could this book be a story that someone made up? If you think a monster is near by, what could you do? How many eyes will your monster have? Will your monster have sharp teeth or claws? What color will your monster be?"
Lesson Activities
1. Add adornments (hairstyle, horns, piercings, tattoos) to the positive space (monster) of the monster collages
2. Add costumes (jewelry, clothing, hats) and details (patterns, stripes, designs) to the positive space (monster) of the monster collages
3. Use black sharpie marker to add line types (horizontal, vertical, diagonal) to the facial features and facial proportions of the Monster In Closet Collages
Day Three, Art Start
1. Retrieve Monster In Closet Collages from Assigned Tables
2. Set Up Studio Area (scissors, glue sticks, oil pastels, cardboard tabs)
Lesson Activities
1. Use neutral colors (black, white, grey) to fill in the positive space (face, nose, shoulder) of the monster collages
2. Use watercolor pencils to fill in the negative space (background) with complementary colors (red, green; blue, orange; yellow, purple) of the monster collages
3. Use value (lightness, darkness) to add shadows (cast shadow, reflective shadow) and highlights (reflective light, light source) to the Monster In Closet Collages
Artist Examples

 Student Examples


 Posts

