Saturday, September 23, 2023
FIREFLY JAR PAINTINGS
Firefly Jar Paintings

Learning Targets
I can...
- Create an original Firefly Jar Paintings using drawing techniques learned in class
- Use color combinations (metallic, glow in the dark, secondary), shape variation (geometric, organic, freeform), and space (positive, negative) inspired by Edo, Meiji, And Tashio Period
- Use painting techniques (underpainting, dry brush, blending, layering) and design principles (composition, proportion, repetition) based on Asian Art
- Define Luminosity (the illusion of light from within the painting)
Lesson One
Day One, Art Start
1. Searching For Fireflies (1768) Suzuki Harunobu

2. Read The Very Lonely Firefly by Eric Carle

3. Discussion Questions "When do fireflies come out? What do we see in the summer night? What happens when you try to catch a firefly? Why do fireflies light up? What do fireflies eat? Do you call them fireflies or lightning bugs? Why do fireflies only appear on hot summer nights? Why do some people call the insects fireflies bugs or lightning bugs? How many fireflies did you find? When did they start to show up before or after dusk? Were the fireflies flying or sitting on something? Which area of the artwork is emphasized by the artist? What is the story being told, if any? How might you feel differently about the world after looking at this artwork? What dose this artwork say about the culture in which it was produced? What does this artwork tell us about the past?"
Lesson Activities
1. Use drawing techniques (layering overlapping cropping) to make a composition for the fireflies paintings
2. Use drawing techniques (layering overlapping cropping to add parts (wings, legs, lightbulb) to the positive space (fireflies) of the fireflies paintings
3. Add design details (eyes, patterns, wings) to the positive space (fireflies) of the Firefly Jar Paintings
Day Two, Art Start
1. Retrieve Firefly Jar Paintings for Assigned Tables
2. Woman And Child Catching Fireflies (1793) Eishosai Choki

3. Discussion Questions "What was happening in history when this artwork was made? How does this change your understanding of the artwork? What are the values and beliefs of the culture in which this artwork was made? How might your interpretation of this artwork be different from someone in another culture? If you could ask this artwork a question, what would you ask it? What does this artwork teach us about the future? How can you connect this artwork to your own life? How does this title contribute to your understanding of the meaning? How did the artist use line, shape, and color to contribute to the mood or meaning of the artwork? What do you think happened before this scene? What do you think happened next? What do you think the artist is trying to say in this artwork? What is the meaning or message? How does your eye move through the artwork? What choices did the artist make to make that happen?"
Lesson Activities
1. Use value (highlights, reflective light, cast shadow) to add contrast to the positive space (foreground) of the fireflies paintings
2. Use value (cast shadow, shadow, highlights) to add contrast to the negative space (background) of the fireflies paintings
3. Use texture (actual, visual, implied) to add details (wings, legs, lightbulb) to the positive space (fireflies) of the Firefly Jar Paintings
Day Three, Art Start
1. Retrieve Firefly Jar Paintings for Assigned Tables
2. Set Up Studio Area (tempera paint, paint brushes, water buckets)
Lesson Activities
1. Use color combinations (glow in the dark, metallic, secondary) to fill in the positive space (fireflies) of the fireflies paintings
2. Use color combinations (glow in the dark, metallic, secondary) to fill in the negative space (background) of the fireflies paintings
3. Use metallic colors (gold, silver, bronze) to outline the line types (horizontal, vertical, diagonal) of the positive space (fireflies) of the Firefly Jar Paintings
Artist Examples


 Student Examples


Monday, August 2, 2021
HERMIT CRAB HOMES
Hermit Crab Homes

Learning Targets
I can...
- Create an original Hermit Crab Homes using sculpture techniques learned in class
- Use form (two dimensional, three dimensional), shape variation (cylinder, cone, pyramid), and texture (rough smooth) inspired by Japanese Artist (1938-Present) Aki Iomata
- Use ceramic techniques (coil method, slab method, slip and score) and design principles (composition repetition proportion) based on Contemporary Art
- Define Three Dimensional (space defined through the dimensions of height, width, and depth)
Lesson One
Day One, Art Start
1. White Chapel (2014) Aki Inomata

2. Read A House for a Hermit Crab by Eric Carle

3. Discussion Questions "Should artists draw boundaries between art and personal life? How do you think people react to her work? Why not hand over a shelter to a hermit crab? What is a hermit crab? What is a natural habitat for a Hermit Crab? How do these different animals move through the ocean? What is a habitat? Which sea animal and habitat might a hermit crab want to use for its next habitat? What ways are you like a hermit crab? Which animals were in the story?"
Lesson Activities
1. Add lines for proportions (head, pinches, shell) within the silhouette of the hermit crab sculptures
2. Mold clay into basic shapes (cylinder, cone, pyramid) for the positive space (body) of the hermit crab sculptures
3. Use modeling tools to draw facial features (eyelashes, eyelids, freckles) within the silhouette of the Hermit Crab Homes
Day Two, Art Start
1. Retrieve Hermit Crab Homes for Assigned Tables
2. Satoyama (2018) Aki Inomata

3. Discussion Questions "What is a Hermit Crab? How small or larger can Hermit Crabs grow? How many varieties of Hermit Crab are there? How long can Hermit Crabs live? Why do Hermit Crabs need shells? Why did the artist use those colors and background for the Hermit Crab? Why do you think is beautiful about this artwork? What can you learn from viewing this artwork?"
Lesson Activities
1. Add facial features (eyelashes, eyelids, freckles) within the silhouette of the Hermit Crab Homes
2. Add details (patterns, gills, swirls) to the positive space (body) of the hermit crab sculptures
3. Use modeling tools (brush grip paddle) to smooth out the facial features (eyelashes, eyelids, freckles) of the Hermit Crab Homes
Day Three, Art Start
1. Retrieve Hermit Crab Homes for Assigned Tables
2. Set Up Studio Area (rubber mat, paintbrushes, water bucket)
Lesson Activities
1. Add tempera paint (red yellow orange) to the positive space (body) of the hermit crab sculptures
2. Add tempera paint (blue green purple) to the negative space (beach) of the hermit crab sculptures
3. Apply Gloss Finish to the facial proportions, facial features, and accessories of the Hermit Crab Homes
Artist Examples


Student Examples


Sunday, August 1, 2021
ERIC CARLE INSPIRED CATERPILLARS
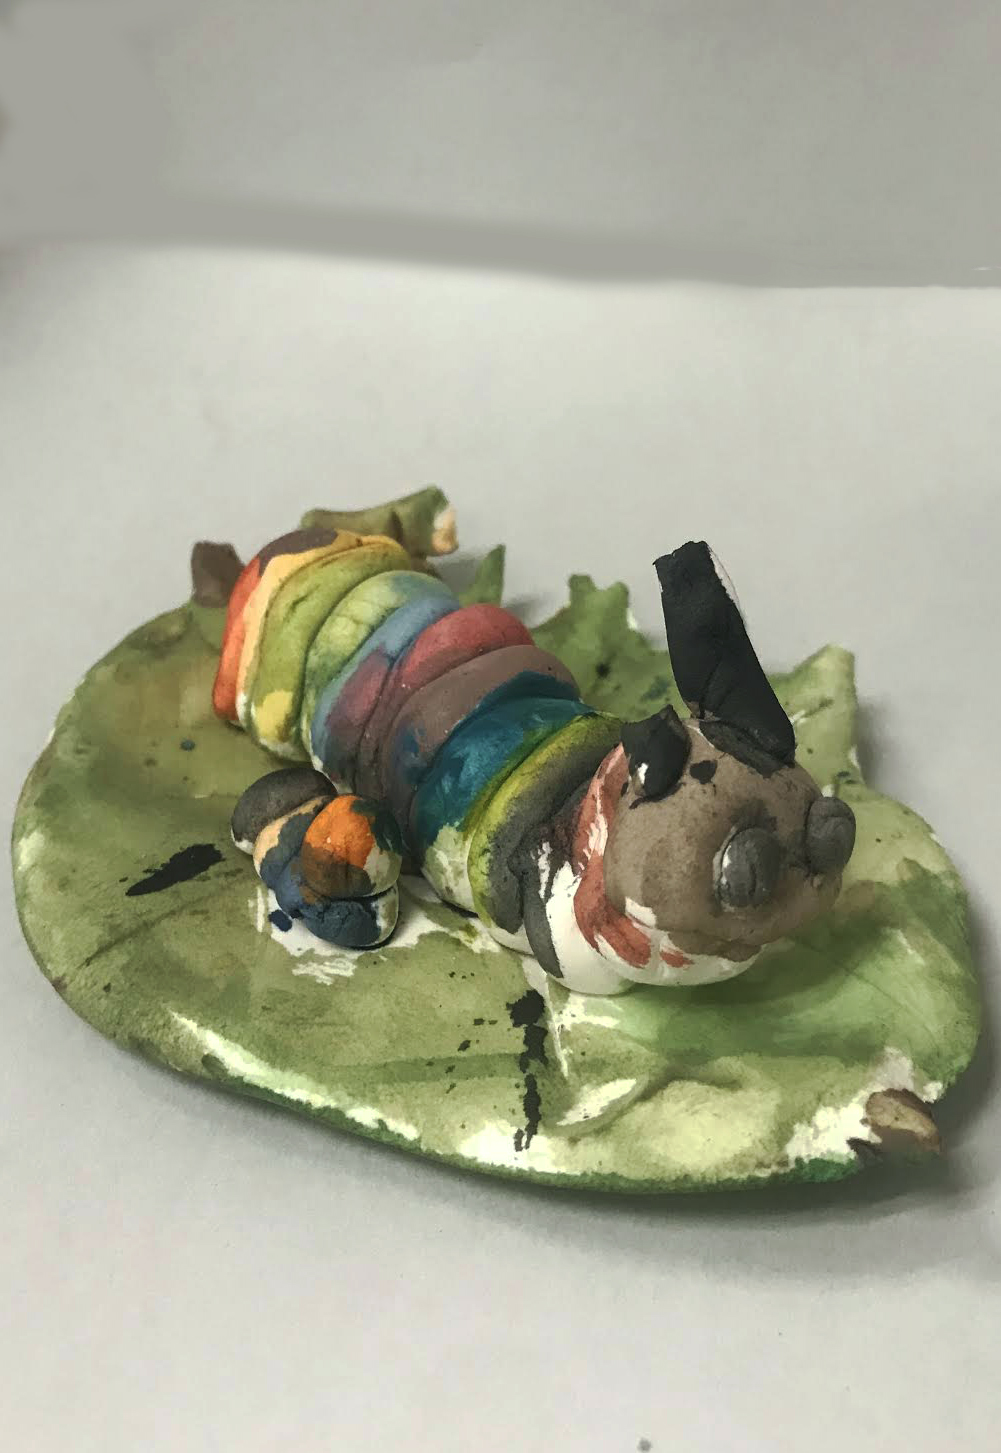
Eric Carle Inspired Caterpillars
Learning Targets
I can...
- Create an original Eric Carle Inspired Caterpillar using sculpture techniques learned in class
- Use analogous colors (orange yellow green), form (cylinder, cone, sphere), and texture (rough, smooth) inspired by American Author (1929-2021) Eric Carle
- Use ceramic techniques (slip and score, hand building, pinch pot) and design principles (balance, proportion, repetition) based on Illustration
- Define Pattern (a design in which lines, shapes, forms, or colors are repeated)
Lesson One
Day One, Art Start
1. Caterpillar Lollipop (1985) Eric Carle

2. Read The Very Hungry Caterpillar by Eric Carle

3. Discussion Questions "Does he look happy? How do you think the artist made this caterpillar? Why do you think the caterpillar is so hungry? What do you notice that is different about this book? What do you know about caterpillars? How many things does he eat on Saturday? How many things is did he eat on Friday? Do pets change? How do trees change? Do people change? How have you changed? What foods would you eat if you were a caterpillar? Where would you fly if you were a butterfly?"
Lesson Activities
1. Use modeling techniques (hand building forming shapes) to make three dimensional spheres for clay caterpillars
2. Use assemblage techniques (attaching slip and score smoothing) to connect the three main body parts (head thorax abdomen) of the clay caterpillars
3. Use addictive techniques (eye balls long legs antennas) to add additional parts to Eric Carle Inspired Caterpillars
Day Two, Art Start
1. Retrieve Eric Carle Inspired Caterpillars for Assigned Table
2. The Rainbow Caterpillar (1985) Eric Carle

3. Discussion Questions "Why are insects colorful? Which insects are bigger, the male or the female? What are some differences between insects? Why are insects symmetrical? What is the most important part of a sculpture? Why times of shapes can you use to break up your sculpture? Where do you think butterflies come from? Have you ever saw a caterpillar or touched a caterpillar? If you have touched one, how did it feel? What color caterpillars have you seen? Why do you think the caterpillar had a stomach ache? Do you think you would have a stomach ache if you ate that much food? What do you do when you have a stomachache? What made the caterpillar feel all better?"
Lesson Activities
1. Use assemblage techniques (attaching slip and score smoothing) to connect the details (eyeballs long legs wings) of the clay caterpillars
2. Add embellishments (beds wire buttons) to decorate the outside (bug) of the clay caterpillars
3. Add imprints (texture plates stamps carving) to the positive space (bug) of the Eric Carle Inspired Caterpillars
Day Three, Art Start
1. Retrieve Eric Carle Inspired Caterpillar for Assigned Table
2. Set Up Studio Area (paint brushes, modeling tools, air dry clay)
Lesson Activities
1. Use analogous colors (green yellow orang) to fill in the positive space (bug) of the Clay Caterpillars
2. Use analogous colors (blue purple red) to fill in the negative space (background) of the clay caterpillars
3. Use metallic colors (gold silver bronze) to outline the line types (horizontal, vertical, diagonal) of the positive space (bug) of the Eric Carle Inspired Caterpillars
Artist Examples

Student Examples



Tuesday, November 3, 2020
CONCENTRIC CIRCLE DESIGNS
Concentric Circle Designs

Learning Targets
I can...
- Create an original Concentric Circle Designs using drawing techniques learned in class
- Use color combinations (analogous secondary intermediate), form (cylinder cone pyramid) and space (positive negative) inspired by German Painter (1880-1916) Franz Marc
- Use art element: shape (square circle triangle) and design principles (composition proportion balanced) based on Expressionism
- Define Contrast (arranging opposite elements to create visual interest)
Lesson One
Day One, Art Start
1. Little Yellow Horses (1912) Franz Marc

2. Read "The Artist Who Painted A Blue Horse" by Eric Carle

3. Discussion Questions "Which artistic movement was Franz Marc associated with? which specific artistic group did Franz Marc belong to? Which of the following artists was not a friend or associate of Franz Marc? What style of painter was Franz Marc? Which artists influenced Franz Marc's wild use of color and brushstrokes? What are the three primary colors? What is framing in composition? What is arbitrary color theory? Where and when was he born? Where did he live? What were his feelings towards animals? what was Marc's favorite animal and color? Which of his paintings was proof of this? What makes his painting "Cows, Red-Green-Yellow" so harmonious and cheerful? Why didn't Marc paint paint animals in their natural color? Why didn't Franz Marc use such powerful, brilliant colors? What did he feel the primary colors represented?"
Lesson Activities
1. Choose 12" X 15" Drawing Paper
2. Draw an outline of animals using drawing techniques (contour line outline continuous) for animal drawings
3. Add line types (horizontal vertical diagonal) to positive space (animal) for Concentric Circle Designs
Day Two, Art Start
1. Retrieve Concentric Circle Designs For Assigned Table
2. Blue Fox (1911) Franz Marc

3. Discussion Questions "What types of lines are in this artwork? What types of colors are in this artwork? How does your eye move through this artwork? What choices did the artist make to make that happen? How does your eye move through this artwork? what choice did the artist make to make that happen? How would you describe this artwork to someone who has never seen it? Who do you think this artwork was created for? What do you think this artist is trying to say in this artwork? What is the meaning or message? What emotions do you notice in this artwork? What emotions do you feel when looking at this? How do you think the artist was feeling when he created this artwork? How did the artist use line, shape, and color to contribute to the mood or meaning? What type of word would you give this artwork? What symbols do you notice in the artwork?"
Lesson Activities
1. Use drawing techniques (contour line outline continuous) to add basic shapes (geometric organic free form) to positive space (animal) of animal drawings
2. Use drawing techniques (contour line outline continuous) to add basic shapes (geometric organic free form) to negative space (background) of animal drawings
3. Use drawing techniques (contour line outline continuous) to add details (facial features repetition) to Concentric Circle Designs
Day Three, Art Start
1. Retrieve Concentric Circle Designs For Assigned Table
2. Set Up Studio Area (markers erasers pencils)
Lesson Activities
1. Use analogous colors (blue red purple) to fill in the positive space (animal) of the animal drawings
2. Use analogous colors (green yellow orange) to fill in the negative space (background) of the animal drawings
3. Add patterns (wavy curved swirl) to the positive space (animal) of the Concentric Circle Designs
Artist Examples
 Student Examples


Saturday, February 8, 2020
LADYBUG PINCH POTS
Ladybug Pinch Pots

Learning Targets
I can...- Create an original Ladybug Pinch Pot using sculpture techniques learned in class
- Use form (two dimensional, three dimensional), analogous colors (red, blue, purple), and texture (implied, actual, visual) inspired by The Grouchy Ladybug by Eric Carle
- Use ceramic techniques (slab method, coil method, pinch pot) and design principles (balance, repetition, movement) based on Children's Book Illustrations
- Define Assemblage (a work of art made by grouping found or unrelated objects)
Lesson One
Day One, Art Start
1. Catarina Naranja (2010) Anonimo


Lesson Activities
1. Use modeling techniques (hand building, forming shapes) to make three-dimensional spheres for clay ladybug2. Use assemblage techniques (attaching, slip/score, smoothing) to connect the three main body parts (head, thorax, abdomen) of the ladybug
3. Use addictive techniques (eyeballs, long legs, wings) to add additional body parts to Ladybug Pinch Pots
Day Two, Art Start
1. Retrieve Ladybug Pinch Pot for Assigned Table2. Pedacitos de Historia (2010) Benito Cabanas

Lesson Activities
1. Use assemblage techniques (attaching, slip/score, smoothing) to connect the details (eyeballs, long legs, wing) of the clay ladybug2. Add embellishments (beads, rainbow wire, buttons) to decorate the outside (bug) of the clay ladybug
3. Add imprints (texture plates, stamps) to outside (bug) of the Clay Ladybug Pinch Pot
Day Three, Art Start
1. Retrieve Ladybug Pinch Pot for Assigned Table2. Set Up Studio Area (paint brushes, water bucket, tempera paint)
Lesson Activities
1. Use analogous colors (red, blue, purple) to fill in the positive space (bug) of the Clay Ladybug Pinch Pot2. Use analogous colors (red, blue, purple) to fill in the negative space (leaf) of the Ladybug Pinch Pot
3. Cover Ladybug Pinch Pot with a clear coat of the Mod Podge for a glossy finish
Artist Examples


 Student Examples


 Posts
Posts

