Tuesday, March 18, 2025
BARBARA KOBYLINSKA BIRD SCULPTURES
Barbara Kobylinska Bird Sculptures Learning Targets

I can...
- Create an original Barbara Kobylinska Bird Sculpture using ceramic techniques learned in class
- Use shape variation (geometric, organic, free form), form (two dimensional, three dimensional), and texture (actual, visual, implied) inspired by Poland Sculptor (1981-Present) Barbara Kobylinska
- Use sculpture techniques (carving, modeling, casting, assembling) and design principles (balance, proportion, emphasis) based on Poland Art
- Define Clay (a natural material composed of minerals, decomposed plant material, and organic substances)
Lesson One
Day One, Art Start
1. Love Birds (2008) Barbara Kobylinska

2. Read Chicken In The Chicken by Nnedi Okorafor

3. Discussion Questions "Did you know Chicken Little is a folktale about a chicken who believes the world is coming to an end? Why happened to Chicken Little in this story? What similarities do you notice between these two books? What differences do you notice between these two books? What would you do if you woke up one night to find the shadow of a giant chicken passing your bedroom door? Is the mischievous giant chicken a friend or foe? Will Anyaugo be Abel to save the food for the New Yam festival the next day? Who was the chicken and why was he in Anyaugo's family's kitchen? How do you think the main character felt at the end? Who does Anyaugo find to help her? What motifs mean love and life to you? What symbols mean love and life to you?"
Lesson Activities
1. Turn clay into basic shapes (head, eyes, body, wings) for the positive space (foreground, animal) of the Barbara Kobylinska Bird Sculptures
2. Use modeling tools to design features (clothing, accessories, mouth) for the positive space (foreground, animal) of the Barbara Kobylinska Bird Sculptures
3. Add lines for the facial features (wings, head, eyes, mouth) for the positive space (foreground, animal) of the Barbara Kobylinska Bird Sculptures
Day Two, Art Start
1. Retrieve Barbara Kobylinska Bird Sculptures for Assigned Tables
2. Firebird (2020) Barbara Kobylinska

3. Discussion Questions "What can we make with these materials? How do artists make someyinth look three dimensional when the material is flat? Do stories and artists like this matter to you? Why do artists need to understand how to represent form in art? What is the history of form in art? What is considered geometric or organic in art? How do artists help to change the world in a positive way? How does the understanding of this artist change our understanding of the artwork? What special features do these chickens have? What is the hidden meaning behind these chickens? What are the unique characteristics of these chickens? What is different about these chicken examples?"
Lesson Activities
1. Add lines for the proportions (head, eyes, beak, body) within the silhouette (figure, foreground, animal) of the Barbara Kobylinska Bird Sculptures
2. Mold clay into basic shapes (oval face, crescent eyes, round body) for the positive space (foreground, animal) of the Barbara Kobylinska Bird Sculptures
3. Use needle tools to design features (eyes, mouth, patterns, wings) for the positive space (foreground, animal) of the Barbara Kobylinska Bird Sculptures
Day Three, Art Start
1. Retrieve Barbara Kobylinska Bird Sculptures for Assigned Tables
2. Set Up Studio Area (rubbing mats, modeling tools, tempera paint, water buckets)
Lesson Activities
1. Add tempera paint with color combinations (analogous colors, warm colors, earth tones) to the positive space (animal, foreground) of the Barbara Kobylinska Bird Sculptures
2. Add tempera paint with color combinations (analogous colors, warm colors, earth tones) to the negative space (background) of the Barbara Kobylinska Bird Sculptures
3. Apply Gloss Finish to the facial features, proportions, and accessories of the Barbara Kobylinska Bird Sculptures
Artist Examples


 Student Examples


Monday, March 17, 2025
CLAY NEON OCTOPUS
Clay Neon Octopus

Learning Targets
I can...
- Create an original Clay Neon Octopus using ceramic techniques learned in class
- Use shape variation (geometric, organic, free form), texture (actual, visual, implied), and form (two dimensional, three dimensional) inspired by Pop Surrealist (2002-Present) Scott Musgrove
- Use sculpture techniques (carving, modeling, casting, assemblage) and design principles (balance, repetition, emphasis) based on Pop Surrealism
- Define Pop Surrealism (art movement combining popular culture with surrealist techniques)
Lesson One
Day One, Art Start
1. Walkopus Getting Out Of Town (2021) Scott Musgrove

2. Read The Octopus Escapes by Maile Meloy

3. Discussion Questions "What color should you paint the body? Did you know octopus are escape artists and puzzle solvers? Did you know octopus can open jars even if trapped inside? What will your octopus try to escape from, an aquarium or somewhere silly? How would you dress to camouflage yourself in a movie theater or soccer field? What does an animal's camouflage tell you about its habitat? What similarities do you notice between these two artists? What differences do you notice between these two artists? What colors do you think an octopus can be? Can octopus be neon colors? Are there any stories about octopus escaping from aquariums?"
Lesson Activities
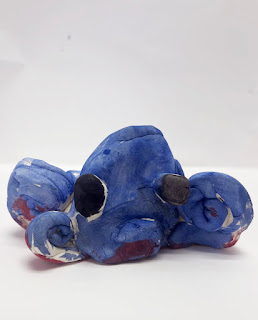
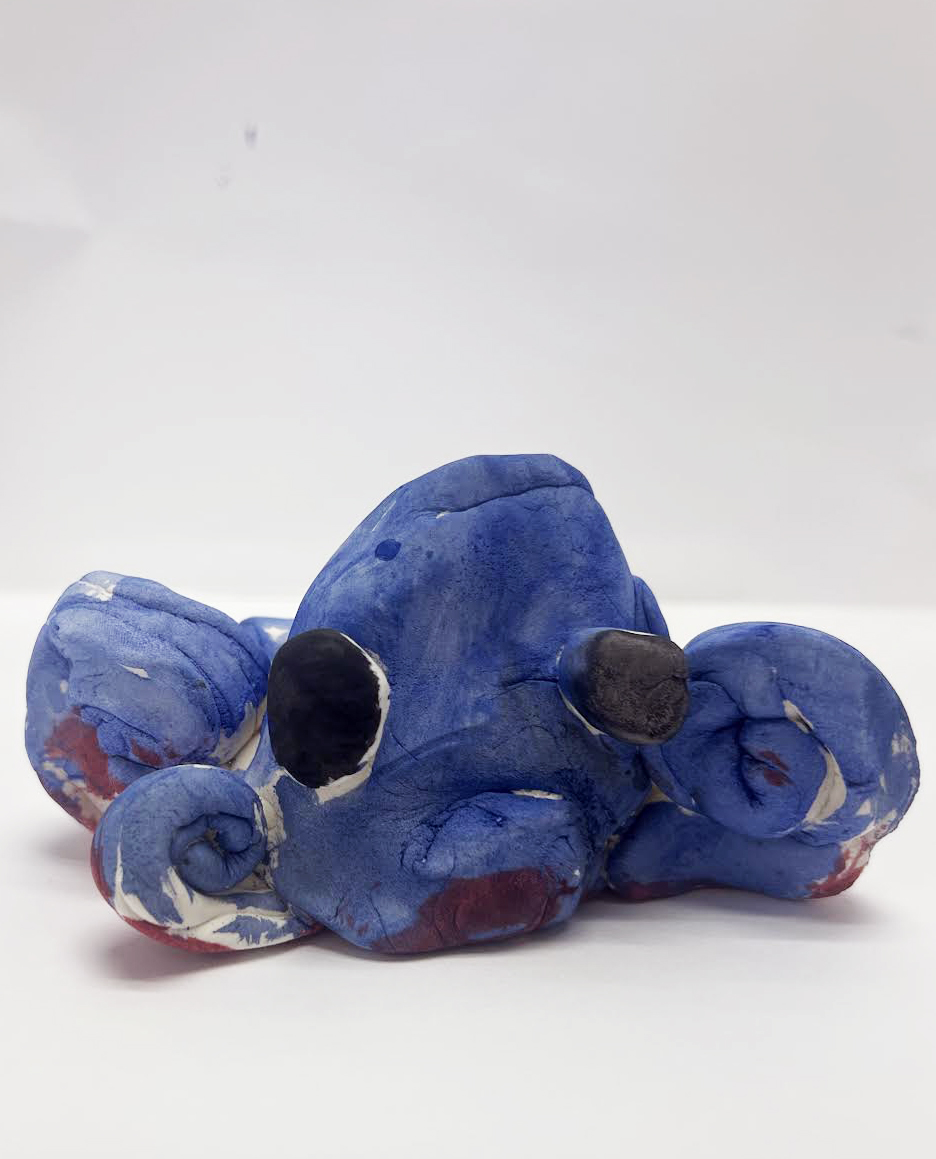
1. Turn clay into basic shapes (head, eyes, body, tentacles) for the positive space (foreground, animal) of the Clay Neon Octopus
2. Use modeling tools to design features (clothing, accessories, eyelashes, mouth) for the positive space (foreground, animal) of the Clay Neon Octopus
3. Add lines for the facial features (tentacles, eyes, mouth) for the positive space (foreground, animal) of the Clay Neon Octopus
Day Two, Art Start
1. Retrieve Clay Neon Octopus for Assigned Tables
2. Twilight Barge (2024) Scott Musgrove

3. Discussion Questions "Where is the setting of the story located? Why does the sea turtle dive "down, down, down"? How does the cloud of ink protect the octopus? Why does the author use "blast off" to describe the octopus escape? Which simile is used in the book multiple times? Which word is an example of an onomatopoeia? How does the octopus get away from the sea turtle? How does camouflage help the octopus? Why do octopus spray ink? What does shallow mean in this passage? What do these animals have in common? What is this passage mostly about? What is the secret weapon the octopus uses against the eel? What type of figurative language is shown in this story? Why are octopus considered such good escape artists? What strategies do octopus use to escape? Are there any famous examples of octopus escaping? What are some of the risks octopus face when escaping?"
Lesson Activities
1. Add lines for proportions (head, eyes, tentacles, body) within the silhouette (figure, foreground, animal) of the Clay Neon Octopus
2. Mold clay into basic shapes (oval face, crescent eyes, round body) for the positive space (foreground, animal) of the Clay Neon Octopus
3. Use needle tools to design features (eyes, mouth, tentacles, patterns) for the positive space (foreground, animal) of the Clay Neon Octopus
Day Three, Art Start
1. Retrieve Clay Neon Octopus for Assigned Tables
2. Set Up Studio Area (modeling tools, water bucket, rubber mat)
Lesson Activities
1. Add tempera paint with color combinations (complementary colors, analogous colors, neon colors) to the positive space (foreground, animal) of the Clay Neon Octopus
2. Add tempera paint with color combinations (complementary colors, analogous colors, neon colors) to the negative space (background) of the Clay Neon Octopus
3. Apply Gloss Finish to the facial features, proportions, and accessories of the Clay Neon Octopus
Artist Examples


 Student Examples




Tuesday, March 4, 2025
CLAY PINATA ANIMALS
Clay Pinata Animals Learning Targets

I can...
- Create an original Clay Pinata Animal using clay techniques learned in class
- Use texture (actual, visual, implied), shape variation (geometric, organic, free form), and line types (horizontal, vertical, diagonal) inspired by the Aztec Empire
- Use sculpture techniques (carving, assembling, modeling, casting) and design principles (composition, gradation, proportion) based on 14th Century Art
- Define Pinata (a decorated container filled with candy broken open at parties)
Lesson One
Day One, Art Start
1. Black And Pink Pig Pinata (2020) Robert Bernavidez

2. Read The Pinata Story by Lisa McCue and Michael McCue

3. Discussion Questions "Did you know that a piñata artist is called a pinetero? What types of hobbies (cooking, baking, sewing, mechanical skills, crafts) could be passed down from generation to generation? Did you know the piñata originated in China? Did you know the first piñatas discovered were fashioned as cows, oxen, or buffalo? Did you know piñata's were burned in the New Year with pieces gathered to bring good luck throughout the year? Did you know Europe created pinatas in the shapes of pineapples and pinecones? Do you know how a piñata is made? What elements do you associate with a celebration in the United States? What types of things do you commonly find at holiday or birthday parties? What was the Battle of Puebla? How did the battle help prevent the confederacy from winning the American Civil War? Do you know of other famous Mexican people such as Frida Kahlo? How are pinatas used in modern culture? Why are pinatas used in modern culture? How can a piñata be considered art? What do many of these pinatas represent? Did you know pinatas are a 400-year-old Mexican tradition?"
Lesson Activities
1. Turn clay slab into basic shapes (head, torso, arms, legs) for the positive space (foreground) of the Clay Piñata Animals
2. Use modeling tools to draw features (clothing, jewelry, accessories) for the positive space (foreground) of the Clay Pinata Animals
3. Add liens for the facial features (nose, eyes, mouth) for the positive space (foreground) of the Clay Pinata Animals
Day Two, Art Start
1. Retrieve Clay Pinata Animals for Assigned Tables
2. Sparrow Piñata (2024) Robert Bernavidez

3. Discussion Questions "What does symbolism meaning in art? Which artists are known for creating sculptures of everyday animals? What is an example of texture in clay art? Which of these artworks best shows a sculpture techniques? What is an armature in sculpture? Which design principle shows repeated patterns? What is going on in this picture? What do you see that makes you say that? what more can you find? What colors do you see? Could you point out these colors? What kind of animal is shown in the picture? What sounds does that animal make? Where can we find warm colors in this artwork? Where do we see cool colors? What textures do you notice in the piñata? Do the texture in the piñata appear to be hard or soft? What type of clay technique would you use to make the flat base of the clay piñata animal?"
Lesson Activities
1. Add lines for proportions (head, torso, arms, legs) within the silhouette (figure, foreground) of the Clay Piñata Animals
2. Mold clay into basic shapes (oval face, crescent ears, big eyes, rectangular body) for the positive space (foreground) of the Clay Piñata Animals
3. Use needle tools to draw features (eyes, nose, mouth, finger nails, wrinkles) for the positive space (foreground) of the Clay Pinata Animals
Day Three, Art Start
1. Retrieve Clay Pinata Animals for Assigned Tables
2. Set Up Studio Area (water bucket, needle tools, rubber mat)
Lesson Activities
1. Add tempera paint with color combinations (complementary colors, analogous colors, earth tones) to the positive space (foreground, figure) of the Clay Piñata Animals
2. Add tempera paint with color combinations (complementary colors, analogous colors, earth tones) to the negative space (background) of the Clay Piñata Animals
3. Apply Gloss Finish to the facial features, facial proportions, and accessories of the Clay Piñata Animals
Artist Examples


Student Examples 


Tuesday, October 22, 2024
RUTH ASAWA HANGING SCULPTURES
Ruth Asawa Hanging Sculptures Learning Targets

I can...
- Create an original Ruth Asawa Hanging Sculptures using sculptures techniques learned in class
- Use line types (meandering, twisting, curving), geometric shapes (polyhedron, face, edge, prism), and space (positive, negative) inspired by Modernist Sculptor (1924-2013) Ruth Asawa
- Undestand sculpture techniques (carving, cast, modeling, assembling) and design principles (balance, emphasis, harmony) based on Modernism
- Define Basket Making (the process of weaving or sewing pliable materials into three dimensional artifacts)
Lesson One
Day One, Art Start

Lesson Activities
1. Choose 3 12" X 12" Colored Yarn
2. Use three compositional elements (shape, color, texture) to represent a special memory, place, or event
3. Use line variation (curved, straight, wavy) as a design principle (balance, movement, repetition) within the Ruth Asawa Hanging Sculptures
Day Two, Art Start
1. Retrieve Ruth Asawa Hanging Sculptures from Assigned Tables
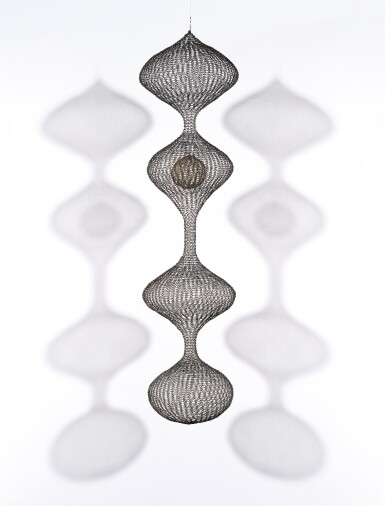
2. S. 645 Hanging Three-Lobed Single Layer Continuous Form (1958) Ruth Asawa

3. Discussion Questions "Who is the artist of each sculpture? What do you know about this artist? What is the subject matter of this artwork? When was this sculpture completed and for whom (if known)? What medium was this sculpture made with? For what purpose or use does the sculpture have? How are these sculptures similar or different? What feeling was the artist trying to convey? How did the artist accomplish this composition? What does this sculpture reveal about the artist and her style? What do these pieces reveal about the society in which they were created? What does the sculpture represent? What do you think is happening in this sculpture? How is the artist telling us a story?"
Lesson Activities
1. Use compasses, protractors, and texture plates to add symmetrical shapes and expressive lines to the Ruth Asawa Hanging Sculptures
2. Use complementary colors (red green; blue orange; yellow purple) to fill in the negative space (background) of the Ruth Asawa Hanging Sculptures
3. Use complementary colors (red green; blue orange; yellow purple) to fill in the positive space (foreground) of the Ruth Asawa Hanging Sculptures
Day Three, Art Start
1. Retrieve Ruth Asawa Hanging Sculptures for Assigned Tables
2. Set Up Studio Area (glue bottles, balloons, string, yarn, brushes, scissors)
Lesson Activities
1. Use scissors to cut out two dimensional symmetrical shapes (square, circle, triangle) to create a three dimensional hanging sculptures
2. Glue down three dimensional symmetrical shapes (cylinder, cube, prism) to create a simplified hanging sculptures
3. Use sharpie marker to add beautiful patterns (stripes, swirls, hearts, dots) to the positive space (foreground) of the Ruth Asawa Hanging Sculptures
Artist Examples


 Student Examples


 Posts
Posts

